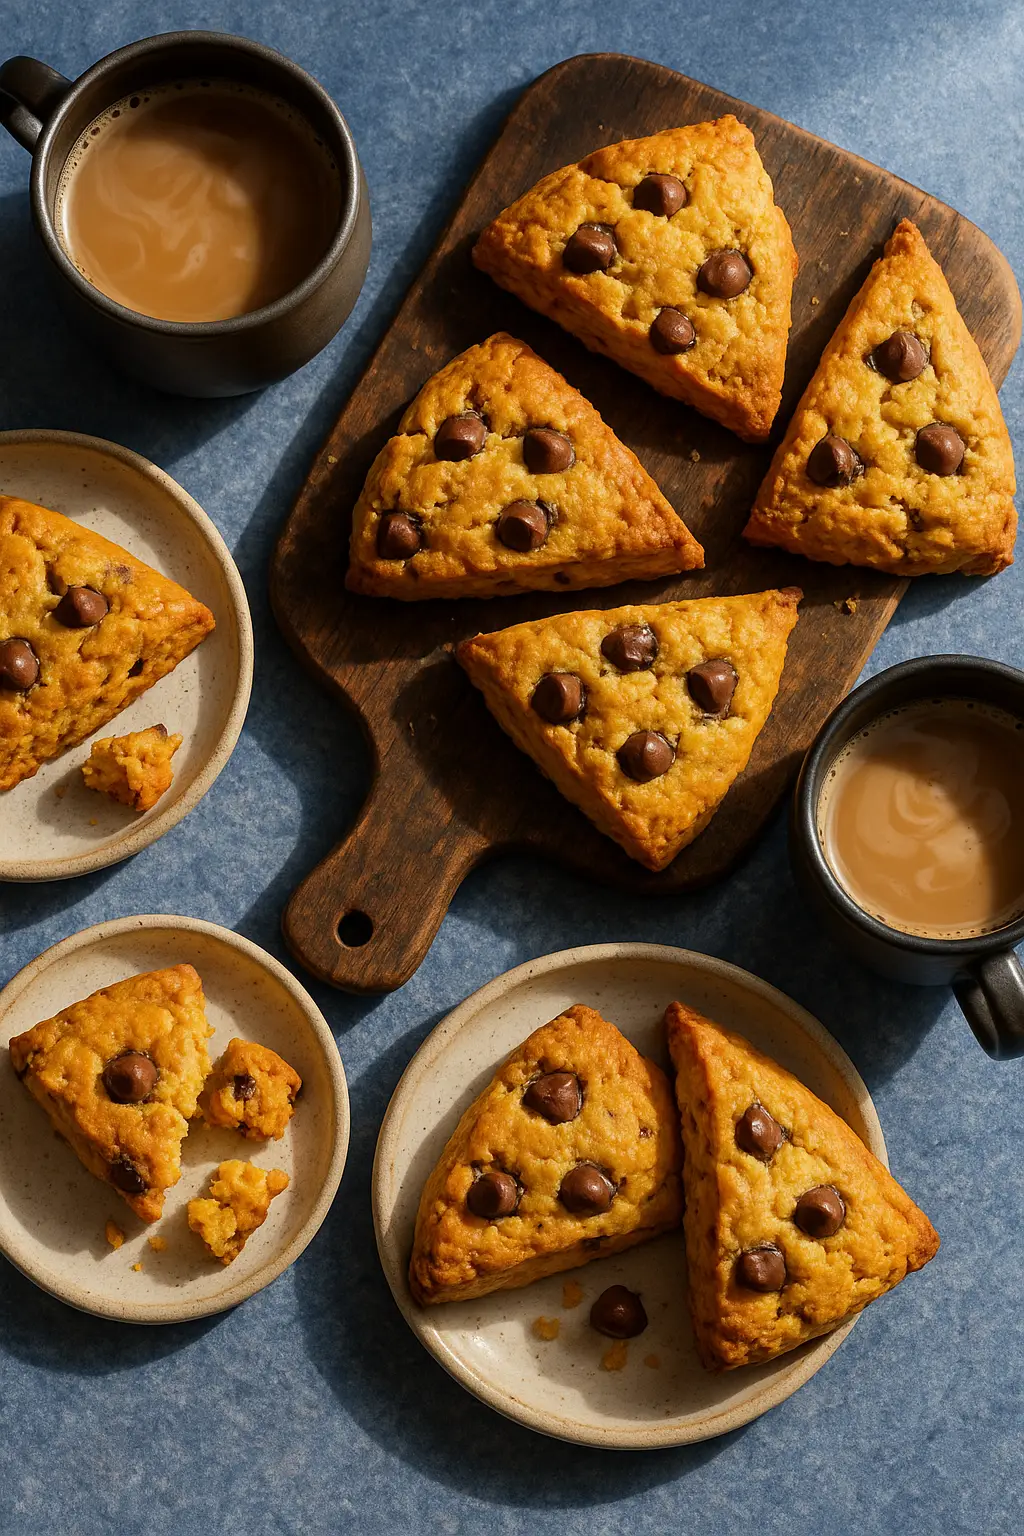
Pumpkin Chocolate Chip Scones
There’s nothing quite like the aroma of warm pumpkin spices wafting through your home on a crisp autumn morning. As golden leaves dance outside your window and the season calls for cozy moments, these Pumpkin Chocolate Chip Scones answer the call perfectly. Tender, flaky, and bursting with the flavors of fall, these scones pair the earthy richness of pumpkin with decadent chocolate chips for an irresistible treat that embodies everything wonderful about autumn baking.
Why These Pumpkin Chocolate Chip Scones Will Become Your Fall Favorite
- Tender & Flaky Texture – The perfect balance between crumbly and moist with a slightly crisp exterior
- Warm Pumpkin Spice Flavor – The quintessential taste of autumn in every bite
- Generously Studded with Chocolate Chips – Sweet morsels that complement the earthy pumpkin perfectly
- Surprisingly Simple Technique – Achievable for bakers of all skill levels
- Perfect Autumn Treat – Ideal for breakfast, brunch, afternoon tea, or whenever you need a cozy pick-me-up
What makes these pumpkin chocolate chip scones truly special is how the pumpkin puree transforms the traditional scone. While classic scones rely heavily on butter for moisture and tenderness, pumpkin puree adds natural moisture and a velvety texture that perfectly complements the buttery, flaky layers. The result? A scone that stays tender longer while delivering that wonderful fall flavor we crave.
Pumpkin Chocolate Chip Scones Recipe Overview
Baking Time and Nutrition Facts
8 Scones
15 Minutes
20 Minutes
385g
40 Minutes
6g
19g
23g
Pumpkin Chocolate Chip Scones Ingredients
Key Ingredients
- For the Scones:
2¼ cups (280g) all-purpose flour
⅓ cup (67g) granulated sugar
1 tablespoon baking powder
½ teaspoon salt
2 teaspoons pumpkin pie spice
½ cup (113g) cold unsalted butter, cubed
½ cup (120g) 100% pure pumpkin puree
¼ cup (60ml) heavy cream, plus more for brushing
1 large egg
1 teaspoon vanilla extract
1 cup (175g) semi-sweet chocolate chips
- Optional Maple Glaze:
1 cup (120g) powdered sugar
2-3 tablespoons pure maple syrup
1-2 tablespoons milk or cream
Key Ingredient Notes
- Butter: MUST be COLD and cubed (or grated if frozen). This is non-negotiable for achieving those flaky layers that make a perfect scone.
- Pumpkin Puree: Use 100% pure pumpkin puree, NOT pumpkin pie filling. Check that your puree isn’t overly watery – if it seems very wet, you can blot it gently with paper towels.
- Flour: All-purpose flour works best. For accurate measuring, spoon the flour into your measuring cup and level it off rather than scooping directly from the bag.
- Spices: Pumpkin pie spice brings that signature fall flavor. No pumpkin pie spice on hand? Mix 1 teaspoon cinnamon, ½ teaspoon ginger, ¼ teaspoon nutmeg, and ¼ teaspoon cloves.
- Heavy Cream: Adds richness and helps create that tender crumb. Keep it cold right until you’re ready to use it.
- Chocolate Chips: Semi-sweet provides the perfect balance with the pumpkin, but dark or milk chocolate work beautifully too. Mini chips distribute more evenly throughout the dough.
How To Make Pumpkin Chocolate Chip Scones
Mastering the Scone Technique
Instructions
- Prep: Preheat your oven to 400°F (200°C). Line a baking sheet with parchment paper.
- Mix Dry Ingredients: In a large bowl, whisk together the flour, sugar, baking powder, salt, and pumpkin pie spice.
- Cut in Butter: Add the cold cubed butter to the flour mixture. Using a pastry blender, two knives, or your fingertips, cut the butter into the flour until the mixture resembles coarse crumbs with pea-sized pieces of butter still visible. (This can also be done in a food processor with a few quick pulses).
- Combine Wet Ingredients: In a separate bowl, whisk together the pumpkin puree, heavy cream, egg, and vanilla extract until smooth.
- Create the Dough: Pour the wet ingredients into the dry ingredients. Using a fork or wooden spoon, gently mix JUST until the dough starts to come together. Do NOT overmix – some dry spots are perfectly fine at this stage.
- Add Chocolate Chips: Gently fold in the chocolate chips with a few strokes. The dough will still look somewhat shaggy.
- Shape the Scones: Turn the dough onto a lightly floured surface. With floured hands, gently bring the dough together and pat it into a circle about 8 inches in diameter and 1-inch thick. Again, handle the dough as little as possible.
- Cut the Scones: Using a sharp knife or bench scraper, cut the circle into 8 equal wedges. For cleaner cuts, flour your knife between cuts.
- Arrange for Baking: Transfer the wedges to your prepared baking sheet, placing them about 2 inches apart. For extra rise and shine, brush the tops lightly with a little heavy cream.
Baking to Golden Perfection
Instructions
- Bake: Place the scones in your preheated oven and bake for 20-24 minutes. Scones need a relatively high temperature to achieve that perfect rise.
- Check for Doneness: The scones are ready when they’ve risen beautifully and turned golden brown around the edges. The tops should feel firm when gently pressed, and a toothpick inserted into the center should come out clean (with perhaps a smear of melted chocolate, but no wet dough).
- Cool: Allow the scones to cool on the baking sheet for 5 minutes before transferring them to a wire rack.
- Glaze (Optional): If using the maple glaze, whisk together the powdered sugar, maple syrup, and enough milk to achieve a drizzling consistency. Once the scones are mostly cooled but still slightly warm, drizzle the glaze over the tops.
- Serve: These scones are absolutely divine when served slightly warm, when the chocolate chips are still a bit melty!
Tips For Perfect Pumpkin Chocolate Chip Scones
Creating truly exceptional scones comes down to technique. Here are the professional secrets that make all the difference:
- Keep Everything Cold – Cold butter creates steam pockets during baking, resulting in those flaky layers we love. If your kitchen is warm or you’re working slowly, pop your bowl of dry ingredients with cut-in butter into the freezer for 5-10 minutes before adding wet ingredients.
- Minimal Mixing is Key – The moment you add liquid to flour, gluten begins developing. More mixing = more gluten = tougher scones. Mix just until the dough comes together, even if it looks a bit rough.
- Use a Light Touch – When shaping your scones, think of your hands as guides rather than tools. Gentle patting rather than pressing or kneading preserves those butter pieces and prevents compacting the dough.
- The Cut Matters – Use a sharp, clean cutter or knife and push straight down without twisting. Twisting seals the edges and can prevent proper rising.
- Chill Before Baking – For extra insurance against spreading, you can chill the shaped scones in the refrigerator for 15 minutes before baking.
Pumpkin Power in Baking
Pumpkin puree isn’t just for flavor – it’s a baker’s secret weapon! Beyond its delicious earthy taste and beautiful color, pumpkin adds remarkable moisture to baked goods. Its high water content and natural sugars help tenderize the crumb, while its density adds structure. In these scones specifically, it creates a perfect balance – maintaining the traditional flaky scone texture while adding a tender quality that keeps them from being too dry or crumbly.
Variations & Serving Suggestions
- Nutty Addition: Fold in ½ cup chopped pecans, walnuts, or pepitas for added crunch and nutrition.
- White Chocolate Wonder: Swap the semi-sweet chips for white chocolate chips for a sweeter, creamier contrast to the pumpkin.
- Spice It Up: Add an extra ½ teaspoon of cinnamon or a pinch of cardamom for a more complex spice profile.
- Perfect Pairings: Serve these scones with:
- A steaming mug of coffee, chai tea, or apple cider
- A spread of softened butter, apple butter, or maple butter
- For special occasions, a dollop of lightly sweetened whipped cream or crème fraîche
Storing Your Pumpkin Chocolate Chip Scones
Like most baked goods, these pumpkin chocolate chip scones are at their absolute best the day they’re made, particularly in the first few hours after baking. However:
- Same Day Storage: Keep at room temperature in an airtight container for up to 12 hours.
- Next Day Refresh: Store overnight in an airtight container. To revive their texture, warm in a 300°F oven for 5-7 minutes or a toaster oven for 2-3 minutes.
- Extended Storage: Freeze baked and completely cooled scones in a single layer, then transfer to a freezer bag for up to 3 months. Thaw at room temperature and warm in the oven before serving.
- Make-Ahead Option: Freeze unbaked shaped scones on a baking sheet until solid, then transfer to a freezer bag for up to 3 months. Bake directly from frozen, adding 3-5 minutes to the baking time.
FAQs About Pumpkin Chocolate Chip Scones
Q: Why did my scones turn out tough?
A: The most common culprit is overmixing the dough after adding the wet ingredients. Mix just until combined, even if the dough looks a bit shaggy.
Q: Can I use oil instead of butter in these scones?
A: Unfortunately, no. Butter is essential for creating the characteristic flaky texture of scones. Solid fats create layers; liquid fats would result in a different texture entirely.
Q: My scones spread too much during baking. What went wrong?
A: Your butter was likely too warm. Make sure it’s cold from the refrigerator, and if your kitchen is warm, consider chilling the shaped scones for 15 minutes before baking.
Q: Can I use canned pumpkin pie filling instead of pure pumpkin puree?
A: No, pumpkin pie filling contains added sugars and spices that would throw off the balance of the recipe. Stick with 100% pure pumpkin puree.
Q: How can I tell if my scones are done without overbaking them?
A: Look for golden edges and a firm top. When lightly pressed, the scone should feel firm and spring back slightly. A toothpick inserted in the center should come out clean except for perhaps melted chocolate.
Q: Can I use buttermilk instead of heavy cream?
A: Yes! Buttermilk makes a wonderful substitute that adds a slight tanginess which complements the pumpkin beautifully.
A Slice of Autumn
There’s something magical about pulling a tray of freshly baked pumpkin chocolate chip scones from the oven on a crisp fall morning. As the spiced aroma fills your kitchen and the chocolate chips remain warm and melty, you’ve created more than just a breakfast treat – you’ve captured the essence of autumn itself.
Whether shared with loved ones over weekend brunch or savored quietly with your morning coffee, these scones celebrate the season’s flavors in each tender, flaky bite. The combination of earthy pumpkin, warm spices, and rich chocolate creates a harmony of flavors that’s both comforting and indulgent – exactly what we crave as the days grow shorter and cooler.
What’s your favorite way to enjoy seasonal scones? Do you prefer them with coffee, tea, or perhaps a warm apple cider? Let me know in the comments if these become your new fall baking tradition! And if you make these pumpkin chocolate chip scones, I’d love to see your creations – tag us on Instagram with!