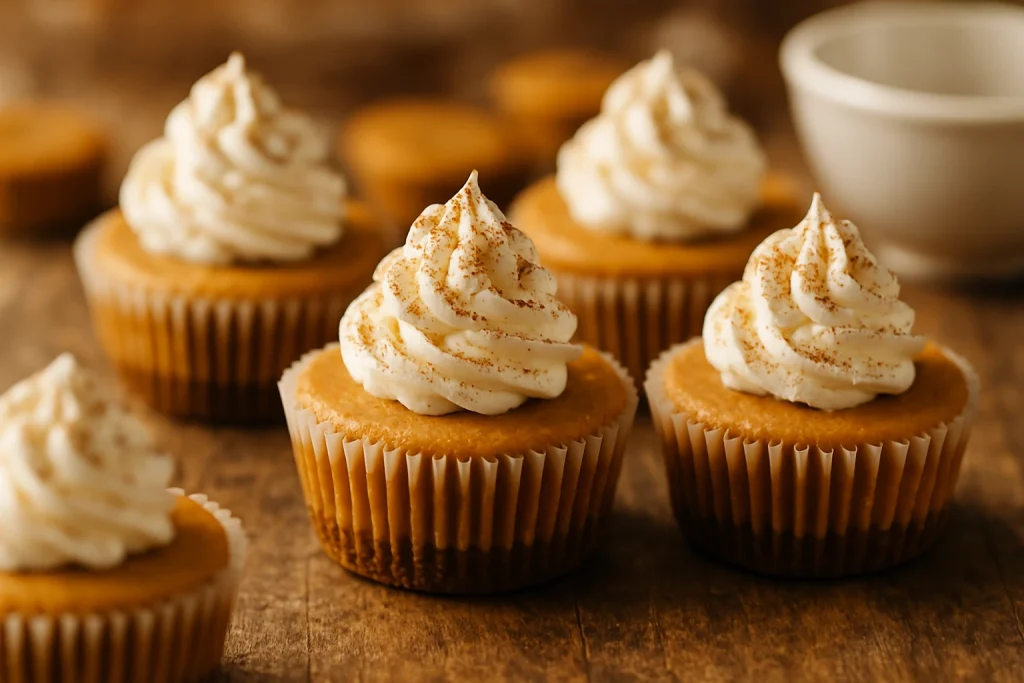
Mini Pumpkin Cheesecakes Recipe
These mini pumpkin cheesecakes offer all the creamy, spiced perfection of a traditional cheesecake but in an adorable, single-serving size. Made in a standard muffin tin, they’re far less intimidating than tackling a full-sized cheesecake, bake faster, and—best of all—are virtually crack-proof! The velvety smooth pumpkin filling, perfectly spiced and nestled on a buttery graham cracker crust, makes these little treasures the star of any fall gathering, Thanksgiving dessert table, or Halloween party.
Why You’ll Love These Mini Pumpkin Cheesecakes
When it comes to fall desserts, these mini pumpkin cheesecakes truly stand out:
- Built-in portion control – no messy slicing required
- Significantly faster baking time than a full-sized cheesecake
- Quicker chilling means less waiting before enjoying
- Less prone to cracking than their full-sized counterparts
- Perfect for entertaining – guests can just grab and go
- Make-ahead friendly – actually better when made a day in advance
- Customizable toppings let everyone personalize their dessert
Mini Pumpkin Cheesecakes Recipe Overview
Baking Time and Nutrition Facts
12 Cheesecakes
25 Minutes
25 Minutes
15 Minutes
4 Hours
5 Hours
Intermediate
285 Kcal
19g
18g
5g
Essential Equipment
- Standard 12-cup muffin tin
- Paper liners
- Electric mixer
- Mixing bowls
- Measuring cups and spoons
- Rubber spatula
- cookie scoop
Mini Pumpkin Cheesecakes Ingredients
Key Ingredients
- For the Graham Cracker Crust:
1 cup/120g – Graham cracker crumbs (about 8 full sheets)
3 Tbsp/38g – Granulated sugar
½ tsp/2.5g – Ground cinnamon (optional)
4 Tbsp/56g – Unsalted butter, melted
- For the Pumpkin Cheesecake Filling:
16 oz/450g – Full-fat cream cheese, at room temperature
⅔ cup/133g – Granulated sugar
⅓ cup/67g – Light brown sugar, packed
1 cup/245g – Pure pumpkin puree (not pumpkin pie filling)
3 Large eggs, at room temperature
1 tsp/5ml – Pure vanilla extract
1 tsp/2.5g – Ground cinnamon
½ tsp/1g – Ground ginger
¼ tsp/0.5g – Ground nutmeg
¼ tsp/0.5g – Ground cloves
¼ tsp/1.5g – Salt
The Baker’s Notes:
Cream Cheese: Always use full-fat, block-style cream cheese. The spreadable kind in tubs contains additives that affect texture and baking performance. Room temperature is absolutely non-negotiable—cold cream cheese will create lumps that are impossible to smooth out once incorporated.
Pumpkin Puree: Use only 100% pure pumpkin puree, not pumpkin pie filling (which contains sugar and spices already). If your puree seems particularly wet, you can blot it gently with paper towels to remove excess moisture.
Eggs: These provide structure and help set the cheesecake. Room temperature eggs incorporate much more smoothly into the batter, preventing lumps and overbeating.
Spices: While you could use pumpkin pie spice (about 2 teaspoons), mixing individual spices allows you to control the flavor profile perfectly. Cinnamon provides warmth, ginger adds zing, nutmeg contributes earthiness, and cloves bring depth.
Graham Crackers: The traditional choice for cheesecake crust, but feel free to experiment with gingersnaps or Biscoff cookies for an extra flavor dimension.
How To Make Mini Pumpkin Cheesecakes
Instructions
- Preparation:
1- Preheat your oven to 325°F (165°C).
2- Line a standard 12-cup muffin tin with paper liners.
3- Ensure your cream cheese and eggs are at room temperature (take them out at least 1-2 hours before starting). - For the Crust:
1- In a medium bowl, combine the graham cracker crumbs, sugar, and cinnamon (if using).
2- Pour in the melted butter and stir until the mixture resembles wet sand and holds together when pressed.
3- Divide the crust mixture evenly among the paper liners (about 1 tablespoon per cup).
4- Using the bottom of a small measuring cup or spice jar, press the mixture firmly into an even layer.
5- Optional but recommended: Bake the crusts for 5 minutes. This helps prevent soggy bottoms by setting the crust slightly. 6- Remove from oven and allow to cool slightly while preparing the filling. - For the Pumpkin Cheesecake Filling:
1- In a large bowl using an electric mixer on low speed, beat the cream cheese until completely smooth, about 2 minutes. Stop frequently to scrape down the sides and bottom of the bowl.
2- Add both granulated and brown sugars and mix on medium-low until smooth and well combined.
3- Add the pumpkin puree, vanilla extract, and all spices plus salt. 4- Mix on low until just combined. Scrape down the bowl again.
5– CRITICAL STEP: Add eggs one at a time, mixing on LOW speed just until each egg disappears into the batter. Do not overmix after adding the eggs—this is key to preventing cracks and avoiding a dense texture. - Assembly and Baking:
1- Divide the filling evenly among the muffin cups, filling each almost to the top (they won’t rise much). An ice cream scoop makes this process much neater.
2- Gently tap the muffin tin on the counter a few times to release any air bubbles.
3- Bake at 325°F (165°C) for 20-25 minutes, or until the edges are set but the centers still have a slight jiggle.
4- Turn off the oven, crack the door open a few inches, and allow the cheesecakes to cool slowly in the oven for about 15 minutes. 5- This gradual cooling helps prevent dramatic temperature changes that can cause cracking.
6- Remove from the oven and cool completely on a wire rack at room temperature (about 30 minutes).
7- Once cooled to room temperature, refrigerate for at least 4 hours, preferably overnight. This chilling time is essential for proper texture development and flavor melding.
Tips for Perfect Mini Pumpkin Cheesecakes
- Room Temperature Ingredients: Cannot stress this enough! Cold cream cheese = lumpy batter = uneven texture.
- Mix Gently: After adding eggs, use low speed only and mix just until incorporated. Overmixing incorporates air, which can cause cracks and a less-than-ideal texture.
- Don’t Overbake: Mini cheesecakes continue cooking as they cool. When they’re ready, the edges should be set but the centers should still wobble slightly when the pan is gently shaken.
- Slow Cooling: The gradual temperature drop from cooling in the turned-off oven helps prevent surface cracks.
- Be Patient: Proper chilling is essential. Resist the temptation to serve these before they’ve had at least 4 hours in the refrigerator.
- Make Ahead: These actually taste better on day two! The flavors have time to develop and meld, making them perfect for preparing a day before your event.
Topping & Serving Suggestions
For the perfect finishing touch, try one (or more) of these delicious options:
- Traditional: A dollop of lightly sweetened whipped cream with a sprinkle of cinnamon
- Decadent: Salted caramel sauce drizzle with a few toasted pecan pieces
- Festive: Small rosette of cream cheese frosting with a tiny candy pumpkin
- Elegant: Dark chocolate shavings or curls
- Sweet & Crunchy: Crumbled gingersnap cookies or candied nuts
For stabilized whipped cream that won’t weep or deflate (perfect for make-ahead situations), beat 1 cup heavy cream with 2 tablespoons powdered sugar and ½ teaspoon vanilla until soft peaks form. Then add 2 tablespoons mascarpone cheese and beat just until stiff peaks form.
How To Store Your Mini Pumpkin Cheesecakes
- Refrigerator: Store mini cheesecakes in an airtight container in the refrigerator for up to 5 days.
- Freezer: These freeze beautifully! Place them in a single layer in an airtight container and freeze for up to 2 months. Thaw overnight in the refrigerator before adding toppings and serving.
- Topping Tip: For best results, add any whipped cream or perishable toppings just before serving.
Ready To Bake ??
These Mini Pumpkin Cheesecakes are the perfect fall dessert—impressive enough for special occasions yet simple enough for everyday indulgence. The individual portions make them ideal for entertaining, and their make-ahead friendly nature means less stress when you’re hosting. The creamy pumpkin filling, perfectly balanced spices, and buttery graham cracker crust create a dessert that captures the essence of autumn in every bite.
Whether you’re hosting Thanksgiving dinner, looking for a Halloween party treat, or simply craving something pumpkin-spiced to celebrate the season, these little cheesecakes are guaranteed to delight. And with their virtually foolproof preparation method, you’ll achieve bakery-quality results every time.
What’s your favorite way to top these mini pumpkin cheesecakes? Let me know in the comments below! Don’t forget to share your creations on social media using #FallBakingJoy #MiniPumpkinCheesecake.
FAQs About Mini Pumpkin CheeseCakes
1. Can I make mini pumpkin cheesecakes ahead of time?
Yes, mini pumpkin cheesecakes are perfect for making ahead. You can prepare them 1–2 days in advance and store them in the fridge. The flavors actually improve after chilling!
2. Do I need a water bath for mini cheesecakes?
No, water baths aren’t necessary for mini cheesecakes. Since they’re smaller and bake more evenly in a muffin pan, they’re less likely to crack like full-size cheesecakes.
3. What kind of crust works best?
A graham cracker crust is classic, but you can also use crushed gingersnaps or vanilla wafers for a spiced or sweet twist. Pre-bake the crusts for best texture.
4. Can I use fresh pumpkin instead of canned?
Yes, just make sure it’s well-puréed and thick. Canned pumpkin is preferred for convenience and consistent results, but homemade purée works if it’s not too watery.
5. How do I know when the cheesecakes are done baking?
The centers should be slightly jiggly but not liquid. They will firm up as they cool. Overbaking can cause cracks, so keep a close eye on them during the final minutes.
6. Can I freeze mini pumpkin cheesecakes?
Absolutely! Once they’re fully cooled, wrap them tightly and freeze for up to 2 months. Thaw overnight in the fridge before serving.
7. What’s the best topping for mini pumpkin cheesecakes?
Popular toppings include whipped cream, a sprinkle of cinnamon or nutmeg, caramel drizzle, or even candied pecans. They’re also delicious plain!
8. Can I make these without a muffin tin?
A muffin tin is best for shape and portion control. If you don’t have one, try using ramekins, mini springform pans, or silicone molds for easy removal.
9. How long do they need to chill?
Let them cool completely, then chill for at least 2–4 hours—overnight is even better. Chilling helps set the texture and enhances the flavor.
10. Can I make them gluten-free?
Yes! Use gluten-free graham crackers or cookies for the crust. Make sure all other ingredients (like vanilla extract or pumpkin purée) are certified gluten-free.