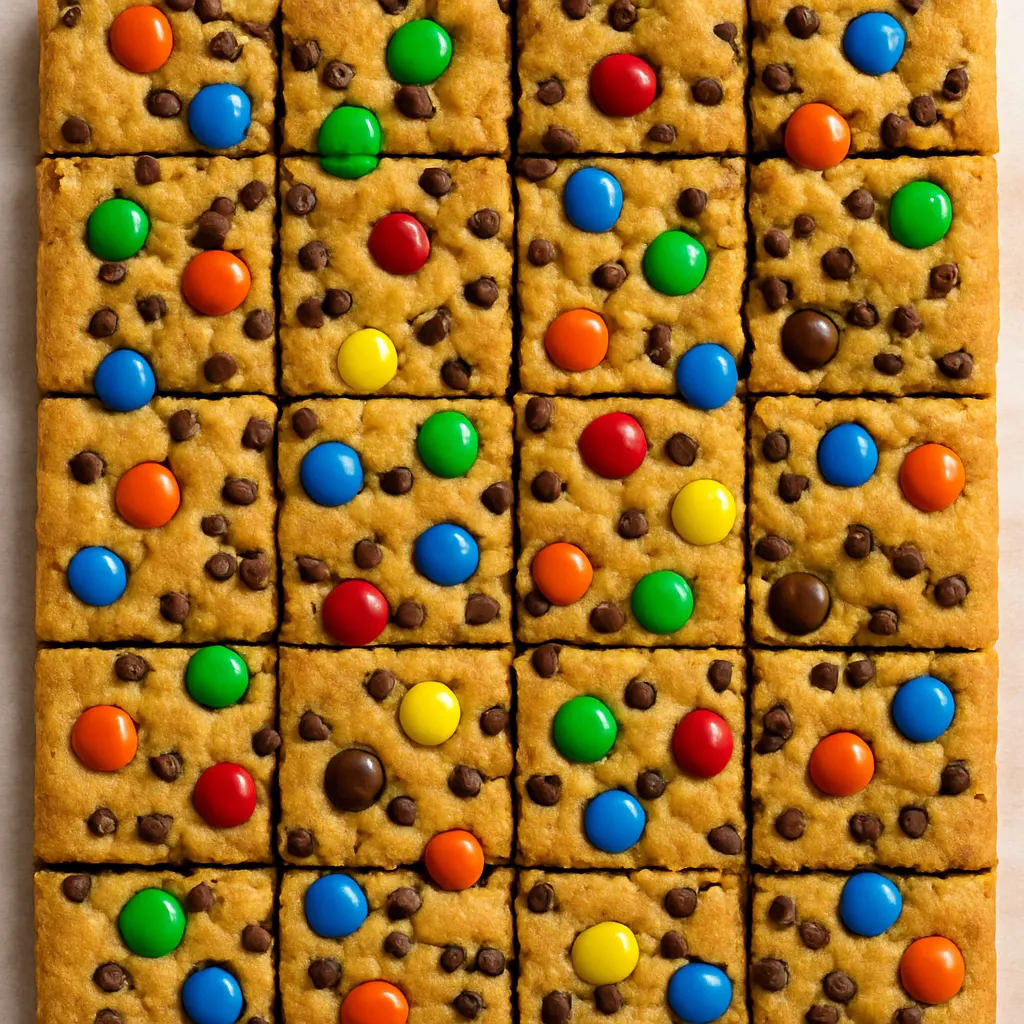
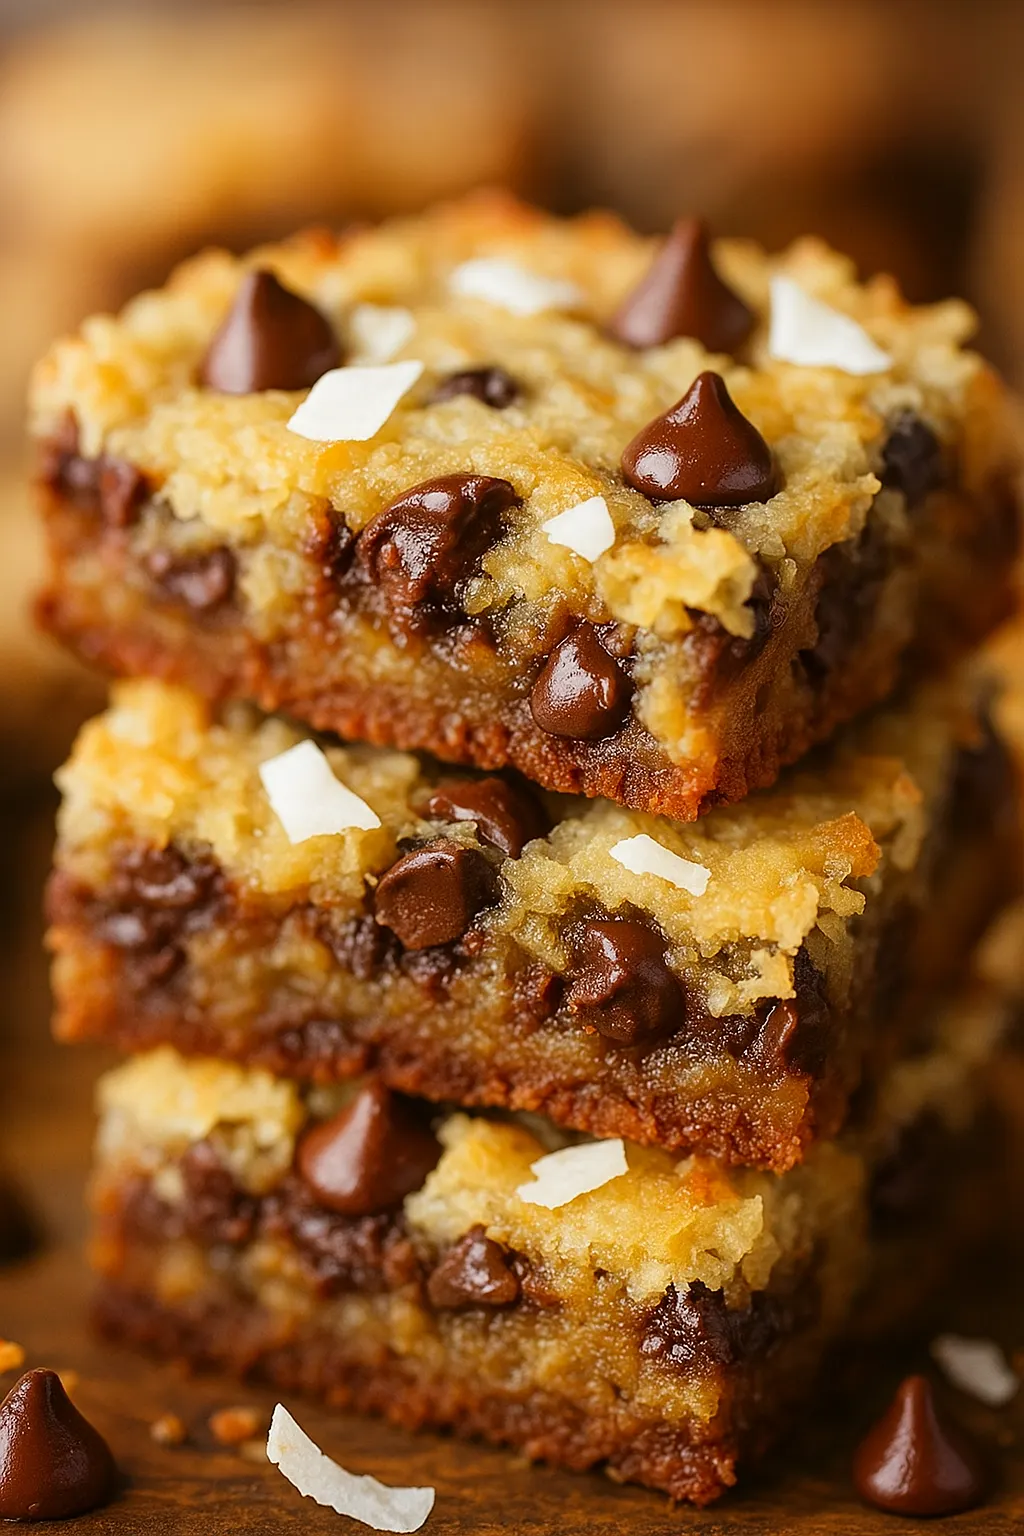
Chewy Chocolate Chip Coconut Bars
These Chocolate Chip Coconut Bars take everything you love about classic cookie bars and give them a seriously delicious upgrade. We’re talking melty chocolate chips in every bite, paired with sweet, chewy coconut that adds the most amazing texture. It’s like your favorite chocolate chip cookie met a tropical vacation and they decided to settle down together. A little bit classic, a little bit tropical, and completely addictive.
Here’s the best part: this is a true one-bowl, one-pan recipe that mixes up in about 10 minutes. No fancy techniques, no chilling time, no complicated steps. Just simple, pantry-friendly ingredients that come together to create something absolutely crave-worthy. Whether you’re baking for a weeknight treat, need something easy for a potluck, or just want to satisfy that dessert craving, these bars deliver every single time.
Why You’ll Be Obsessed with These Bars
- One-Bowl Wonder: Everything mixes together in a single bowl, which means minimal mess and easy cleanup. Your dishwasher (or sink) will thank you!
- Incredibly Chewy & Moist: We’re using melted butter and the perfect ratio of brown sugar to create that irresistible chewy texture that stays soft for days. These bars don’t dry out—they just get better.
- Loaded with Flavor: Every single bite is packed with gooey, melty chocolate chips and ribbons of sweet coconut. It’s the perfect flavor combination that keeps you coming back for “just one more piece.”
- So Fast & Easy: No waiting for dough to chill, no rolling dough balls, no baking in batches. Just mix everything up, press it into your pan, and slide it into the oven. Done!
- The Ultimate Potluck Hero: These bars are sturdy enough to transport easily, they look impressive in the pan, and they’re always the first dessert to disappear from the table. Trust me on this one.
- Super Customizable: Want to add chopped nuts? Go for it! Prefer milk chocolate? Make the swap! These bars are your blank canvas for creating your perfect dessert bar.
Chocolate Chip Coconut Bars Recipe Overview
Baking Time and Nutrition Facts
16 bars
10 minutes
24 minutes
185 kcal
2 hours
1 hour 35 minutes
25 g
Easy
Chocolate Chip Coconut Bars Ingredients
Key Ingredients
½ cup (113g) unsalted butter, melted
¾ cup (150g) light brown sugar, packed
¼ cup (50g) granulated sugar
1 large egg, room temperature
2 teaspoons pure vanilla extract
1¼ cups (156g) all-purpose flour
½ teaspoon baking soda
½ teaspoon salt
1 cup (170g) semi-sweet chocolate chips, plus extra for topping
¾ cup (60g) sweetened shredded coconut, plus extra for topping
Baker’s Notes on Ingredients:
Melted Butter is Key: Using melted butter instead of softened butter is my secret weapon for creating that extra chewy, dense, brownie-like texture in these bars. It’s a total game-changer!
Brown Sugar Magic: Don’t even think about skipping or reducing the brown sugar! It provides essential moisture and that rich, caramel-like flavor that makes these bars so incredibly addictive. The molasses in brown sugar is what keeps them soft and chewy.
Sweetened vs. Unsweetened Coconut: I always use sweetened shredded coconut for this recipe. The added sugar helps the coconut stay moist and chewy during baking. Unsweetened coconut can turn out a bit dry and doesn’t have quite the same texture.
How To Make Chocolate Chip Coconut Bars
Instructions
- Prep Your Pan
Preheat your oven to 350°F (175°C). Lightly grease your baking pan, then line it with a parchment paper sling. Cut your parchment so it covers the bottom and hangs over two opposite sides of the pan by a couple of inches. This is your secret weapon for lifting the bars out later! - Mix the Wet Ingredients
In your large mixing bowl, whisk together the melted butter, brown sugar, and granulated sugar until the mixture is completely smooth and no lumps of brown sugar remain—this should take about a minute of whisking. Add the egg and vanilla extract, and whisk again until everything is well combined and glossy. - Add the Dry Ingredients
Add the flour, baking soda, and salt directly into the same bowl—right on top of your wet ingredients. Switch from your whisk to a rubber spatula and gently stir everything together until just combined.
Baker’s Tip: Here’s the most common mistake people make with cookie bars—overmixing! Stop mixing as soon as you no longer see streaks of flour. The batter will be thick and that’s exactly what we want. Overmixing develops gluten and will make your bars tough instead of tender and chewy. - Fold in the Chocolate & Coconut
Pour in the chocolate chips and sweetened shredded coconut. Gently fold them into the batter with your spatula until they’re evenly distributed throughout. The batter will be quite thick and almost dough-like—that’s perfect! - Press & Bake
Scrape all of that delicious batter into your prepared pan. Use your spatula (or lightly greased hands) to press it into an even layer, making sure to get it all the way into the corners. For that gorgeous bakery-worthy look, sprinkle a few extra chocolate chips and a small handful of coconut over the top and gently press them in.
Bake for 25-30 minutes (closer to 25 for a 9×9 pan, 28-30 for an 8×8 pan). You’re looking for edges that are golden brown and a center that looks just barely set. The center might look slightly underdone—that’s what we want! The bars will continue cooking from the residual heat as they cool. - Cool Completely (Don’t Skip This!)
Remove the pan from the oven and place it on a wire rack. Here comes the hardest part—you need to let these bars cool completely in the pan. I’m talking at least 1-2 hours, or until they’ve reached room temperature.
Why is this so important? The center needs time to set up properly. If you try to slice into them while they’re still warm, you’ll end up with a gooey, crumbly mess instead of clean, beautiful bars. I know the wait is tough when they smell this good, but trust me—it’s worth it!
Once completely cool, use your parchment sling to lift the entire slab out of the pan, place it on a cutting board, and slice into bars.
Tips for Perfect Chocolate Chip Coconut Bars
The Parchment Sling is a Game-Changer: This simple trick makes removing and slicing your bars so much easier! Without it, you’ll struggle to get that first bar out of the pan intact. With it, you can lift the whole thing out, slice it on a cutting board, and get perfect bars every single time.
Don’t Overbake! This is crucial for achieving that gooey, chewy texture we’re after. Your bars are done when the edges are set and golden, but the center still looks just a tiny bit soft and underbaked. Remember, they continue baking in the hot pan as they cool. Overbaked bars will be dry and crumbly instead of moist and chewy.
Patience is a Virtue (The Cooling Rule): I can’t stress this enough—let those bars cool completely! I know it’s tempting to cut into them right away, but warm bars will fall apart and won’t have that perfect texture. If you’re in a rush, you can pop the pan in the fridge after about 30 minutes of cooling on the counter to speed things up.
Toasted Coconut Twist: Want to take these bars up a notch? Toast half of your coconut before adding it to the batter. Spread it on a baking sheet and bake at 350°F for 5-7 minutes, stirring every couple of minutes, until lightly golden. The toasted coconut adds an incredible depth of flavor and nutty aroma that’s absolutely amazing.
Room Temperature Egg: This might seem picky, but using a room temperature egg helps it incorporate more easily into the butter and sugar mixture, creating a smoother batter. Just leave your egg on the counter for about 30 minutes before you start baking.
Chocolate Chip Coconut Bars Variations
Nutty Crunch: Fold in ½ cup of chopped toasted pecans or walnuts along with the chocolate chips and coconut. The nuts add a wonderful crunch that contrasts beautifully with the chewy coconut.
Salty & Sweet Perfection: As soon as your bars come out of the oven, sprinkle a pinch of flaky sea salt over the top. The salt enhances all the flavors and creates that addictive sweet-salty combination.
Chip Medley: Get creative with your chocolate! Use half semi-sweet and half milk chocolate chips for a sweeter bar. Or try white chocolate chips for a tropical vibe. Butterscotch chips are also incredible with the coconut!
Almond Joy Vibes: Add ½ teaspoon of almond extract along with the vanilla, and press a few whole almonds on top before baking. You’ll have Almond Joy bars!
Double Coconut: If you’re a serious coconut lover, replace ¼ cup of the flour with ¼ cup of coconut flour for even more coconut flavor.
Storing Your Chocolate Chip Coconut Bars
On the Counter: Store your chocolate chip coconut bars in an airtight container at room temperature, and they’ll stay perfectly fresh and chewy for up to 5 days. Layer them between sheets of parchment paper if you’re stacking them to prevent sticking.
For Longer Storage: These bars freeze beautifully! You can freeze the entire uncut slab by wrapping it tightly in plastic wrap and then in aluminum foil. Or slice them into individual bars, wrap each one in plastic wrap, and store them all in a freezer-safe bag or container. They’ll keep for up to 3 months. To enjoy, just thaw at room temperature for about 30 minutes, or pop a frozen bar in the microwave for 15-20 seconds for that warm, fresh-baked taste.
FAQs About Chocolate Chip Coconut Bars
Can I use unsweetened coconut instead of sweetened?
You can, but I don’t recommend it for this recipe. Sweetened coconut adds moisture and that signature chewy texture we’re after. If you only have unsweetened, add an extra 2 tablespoons of sugar and expect a slightly less moist result.
Why are my bars falling apart when I cut them?
The number one reason is cutting them too soon! These bars absolutely must cool completely (1-2 hours) before slicing. The center needs time to set up. Also make sure you didn’t overbake them, which can make them crumbly.
Can I make these in a different size pan?
Yes! A 9×13-inch pan will give you thinner bars (bake for 18-20 minutes). An 8×8-inch pan makes thick, decadent bars (bake for 24-26 minutes). Just watch for golden edges and a just-set center.
My bars turned out cakey instead of chewy. What happened?
This usually means they were overbaked or the batter was overmixed. Remember to pull them when the center still looks slightly soft, and mix just until the flour disappears—no more!
Can I substitute the butter?
For best results, stick with real butter. However, coconut oil (melted and measured the same way) works in a pinch and actually enhances the coconut flavor! Margarine or vegetable oil spreads won’t give you the same rich flavor or texture.
Do these need to be refrigerated?
Nope! These bars are perfectly fine stored at room temperature in an airtight container for up to 5 days. Refrigerating them will actually make them firmer and less chewy.
Can I double this recipe?
Absolutely! Double all the ingredients and use a 9×13-inch pan. Start checking for doneness around 28-30 minutes. This gives you a big batch perfect for parties or bake sales.
What if I don’t have brown sugar?
In a pinch, you can use all granulated sugar, but you’ll lose some of that chewy texture and caramel flavor. For a better substitute, mix 1 cup granulated sugar with 1 tablespoon of molasses.
Can I add other mix-ins?
Yes! These bars are super forgiving. Try adding dried cranberries, white chocolate chips, macadamia nuts, or even a swirl of Nutella on top before baking. Just keep total mix-ins to about 1½-2 cups so the bars hold together.
How do I know when they’re done baking?
Look for golden brown edges that are set and pulling slightly away from the pan. The center should look just barely set—it can even look slightly shiny or soft. A toothpick inserted in the center should come out with a few moist crumbs, not wet batter.
Your New Favorite Easy Dessert
There you have it, friends—the easiest, most delicious chocolate chip coconut bars you’ll ever make! This recipe is one of those keepers that you’ll find yourself coming back to again and again. It’s simple enough for a Tuesday night craving, impressive enough for your next potluck or bake sale, and tasty enough that everyone will be asking you for the recipe.
The best part? You probably have most of these ingredients sitting in your pantry right now. No special trips to the store, no fancy equipment, no complicated techniques. Just a bowl, a pan, and about 10 minutes of hands-on time standing between you and these incredible chewy cookie bars.
So go ahead and preheat that oven! Whether you’re baking these for a crowd, sharing them with friends, or keeping them all to yourself for your weekly movie night (no judgment here!), I promise these bars are going to become a staple in your dessert rotation.
I’d love to hear how these turn out for you! Drop a comment below and let me know what you think. Did you try any of the variations? Add your own favorite mix-ins? Rate the recipe and share your tips with the community. Happy baking!