White Chocolate Macadamia Nut Cake
This isn’t just another cake. This is the white chocolate macadamia nut cake—a sophisticated centerpiece that transforms any celebration into an unforgettable occasion. The kind of dessert that makes guests fall silent on the first bite, then ask for seconds. The kind of cake that photographs beautifully but tastes even better.
And here’s the best part: while this gourmet layer cake looks like it requires professional pastry training, I’m going to walk you through every single step with the precision and clarity that makes success inevitable. Whether you’re baking for a milestone birthday, an anniversary dinner, or simply because you deserve something spectacular, this recipe will guide you to a showstopping result.
Why This Cake is a True Showstopper
Sophisticated Flavor Profile: This isn’t a one-note sweet dessert. The marriage of buttery macadamia nuts, creamy white chocolate, and warm brown sugar vanilla creates layers of complexity that appeal to even the most discerning palates. Each flavor enhances the others without competing.
Incredible Textural Contrast: Every forkful is a study in perfect balance—the tender, impossibly moist crumb melts on your tongue while toasted macadamia nuts provide that satisfying crunch, all enveloped in a cloud of silky-smooth frosting that’s simultaneously rich and light.
Stunning Visual Appeal: A beautiful three-layer cake crowned with artful white chocolate curls and golden toasted nuts becomes the centerpiece of your celebration table. This is the cake that makes people reach for their cameras before their forks.
Perfectly Moist Crumb: Our carefully balanced combination of brown sugar, buttermilk, and proper mixing technique guarantees a rich, tender cake that stays beautifully moist for days—never dry, never dense.
Gourmet Frosting: This is real white chocolate buttercream made with quality baking chocolate and European-style technique. It pipes beautifully, spreads like a dream, and tastes like liquid silk.
Celebration-Worthy: Whether it’s a birthday cake recipe you’ll return to year after year, an anniversary dessert that says “I love you” in the most delicious way possible, or your signature contribution to the holiday dessert table, this elegant layer cake rises to every occasion.
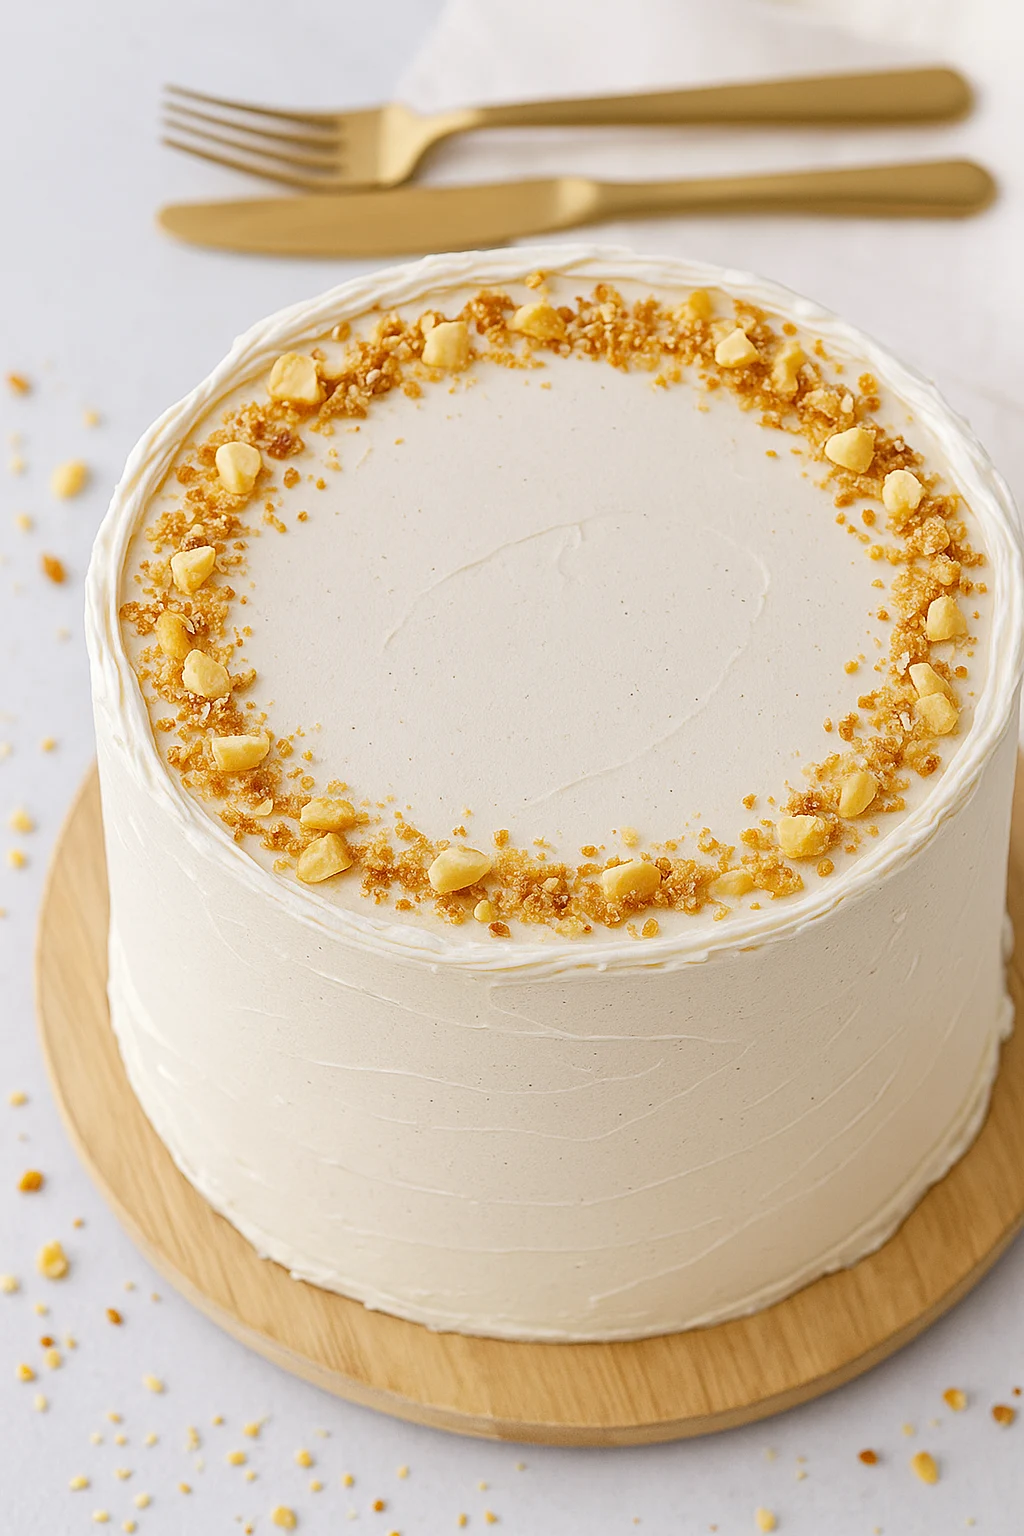
White Chocolate Macadamia Nut Cake Recipe Overview
Baking Time and Nutrition Facts
14 generous slices
45 minutes
2 hours
785 kcal
Intermediate
30 minutes
45 minutes
4 hours
White Chocolate Macadamia Nut Cake Ingredients
 Print
Print
Key Ingredients
- For the Macadamia Nut Cake Layers
3 cups (360g) all-purpose flour
¾ teaspoon fine sea salt
1 cup (226g) unsalted butter, softened to room temperature
1 cup (200g) light brown sugar, packed
¾ cup (150g) granulated sugar
4 large eggs, room temperature
2 teaspoons high-quality vanilla extract
1¼ cups (300ml) buttermilk, room temperature
1½ cups (180g) roasted and salted macadamia nuts, coarsely chopped
1 cup (170g) white chocolate chips or chunks
- For the White Chocolate Buttercream Frosting
12 ounces (340g) high-quality white chocolate (baking bars, not chips), chopped
1½ cups (339g) unsalted butter, softened to room temperature
4 cups (480g) powdered sugar, sifted
¼ cup (60ml) heavy cream, plus more as needed
2 teaspoons vanilla extract
Pinch of fine sea salt
- For Garnish
½ cup toasted whole or chopped macadamia nuts
White chocolate curls or shavings
Optional: salted caramel drizzle
Chef’s Notes on Ingredients
The Sugar Combination: Using both brown and granulated sugar isn’t just for flavor—the molasses in brown sugar adds moisture and creates a more tender crumb, while granulated sugar provides structure. This combination ensures your cake stays beautifully moist for days.
Room Temperature Matters: This is non-negotiable. Room temperature butter, eggs, and buttermilk emulsify properly, creating a smooth, uniform batter that bakes into a lighter, more tender cake. Cold ingredients can cause the batter to curdle or become dense.
White Chocolate Quality: Choose a high-quality white chocolate with cocoa butter listed as the first or second ingredient. Avoid candy melts or white chips for the frosting—they contain stabilizers that prevent smooth melting and create a waxy, grainy texture. Brands like Ghirardelli, Guittard, or Valrhona deliver superior results.
Macadamia Nuts: Roasted and salted macadamias provide the best flavor, but if you can only find raw nuts, toast them yourself and add a pinch of flaky sea salt to the batter.
How To Make White Chocolate Macadamia Nut Cake
Instructions
- Prep Work (Don’t Skip This!)
- Step 1: Preheat your oven to 350°F (175°C). Position the oven racks in the center of your oven for even heat distribution.
- Step 2: Prepare your cake pans by greasing them generously with butter or non-stick spray, then dust with flour (tap out excess) or line the bottoms with parchment paper circles. This ensures your cakes release perfectly every time.
- Step 3: If your macadamia nuts aren’t already toasted, spread them on a baking sheet and toast in your preheating oven for 5-7 minutes until fragrant and lightly golden. Let them cool completely before chopping—this step is absolutely essential for maximum flavor and crunch.
- Make the Cake Batter
- Step 4: In a medium bowl, whisk together the flour, baking powder, and salt. Set aside.
- Step 5: In the bowl of your stand mixer fitted with the paddle attachment (or using a hand mixer), cream the softened butter with both sugars on medium-high speed for 4-5 minutes. The mixture should be noticeably lighter in color and fluffy in texture—this incorporates air that helps create a tender crumb.
- Step 6: Reduce speed to medium and add the eggs one at a time, beating well after each addition. Scrape down the sides of the bowl as needed. Add the vanilla extract and mix until combined.
- Step 7: With the mixer on low speed, add the flour mixture in three additions, alternating with the buttermilk in two additions. Begin and end with the flour mixture. Chef Tip: Mix only until you no longer see streaks of flour after each addition—overmixing develops gluten and creates a tough, dense cake instead of a tender one.
- Step 8: Remove the bowl from the mixer. Using a rubber spatula, gently fold in the chopped toasted macadamia nuts and white chocolate chunks until evenly distributed throughout the batter.
- Bake & Cool
- Step 9: Divide the batter evenly among your prepared pans. Use a kitchen scale for precision if you have one—each 8-inch pan should hold approximately 650-700g of batter. Smooth the tops gently with an offset spatula.
- Step 10: Bake for 28-32 minutes for 8-inch layers (or 32-36 minutes for 9-inch layers), until the cakes are golden, spring back when gently pressed, and a toothpick inserted into the center comes out with just a few moist crumbs attached—not wet batter, but not completely clean either.
- Step 11: Let the cakes cool in their pans on wire racks for exactly 15 minutes. This allows them to set without becoming soggy. Then run a knife around the edges and carefully invert onto the cooling racks. Peel off the parchment if used. Critical: Let cakes cool completely to room temperature before frosting—this takes at least 2 hours. Frosting a warm cake will cause your buttercream to melt and slide right off.
- Make the White Chocolate Buttercream
- Step 12: Melt the chopped white chocolate using a double boiler or in the microwave (in 20-second intervals, stirring between each). Once fully melted and smooth, let it cool until it’s barely warm to the touch but still liquid—about 10-15 minutes. If it’s too hot, it will melt your butter and create a soupy frosting.
- Step 13: In your stand mixer bowl with the paddle attachment (make sure it’s completely clean and dry), beat the softened butter on medium-high speed for 3-4 minutes until it’s pale, creamy, and increased in volume.
- Step 14: Reduce speed to low and gradually add the sifted powdered sugar, one cup at a time, beating well after each addition. Scrape down the bowl as needed.
- Step 15: Pour in the cooled melted white chocolate, vanilla extract, and salt. Beat on medium speed until completely combined and smooth.
- Step 16: Add the heavy cream one tablespoon at a time, beating on medium-high speed after each addition, until your frosting reaches a light, fluffy, spreadable consistency. You may not need all the cream, or you might need an extra tablespoon—it depends on your specific butter and chocolate. The frosting should hold soft peaks and spread easily without being runny.
- Assemble & Frost Like a Pro
- Step 17: Level your cake layers if they domed during baking. Use a long serrated knife or a cake leveler to carefully slice off any rounded tops, creating flat, even layers.
- Step 18: Place your first cake layer on a cake stand, turntable, or serving plate. If you’re concerned about keeping your plate clean, tuck strips of parchment paper under the edges of the cake (you’ll remove these at the end).
- Step 19: Using an offset spatula, spread about 1 cup of frosting evenly over the first layer, going all the way to the edges. Place the second layer on top and repeat with another cup of frosting. Add the third layer, flat side up.
- Step 20: The Crumb Coat—Your Secret Weapon: Apply a thin layer of frosting all over the entire cake—top and sides. This doesn’t need to be perfect; you’re simply trapping any loose crumbs so they don’t interfere with your final, beautiful coat. Refrigerate the cake for 30 minutes to let this layer set.
- Step 21: Apply your final coat of frosting generously, using smooth, even strokes. For perfectly smooth sides, hold your offset spatula at a slight angle and rotate your turntable (or carefully rotate the cake plate) while holding the spatula steady against the frosting.
Chef Patissier’s Secrets for a Flawless Cake
The Power of Toasting: Never skip toasting your macadamia nuts, even if they’re labeled “roasted.” Those few minutes in the oven deepen their buttery flavor exponentially and ensure they maintain their satisfying crunch throughout the moist cake. Raw nuts will become soggy and bland.
The Crumb Coat is Key: This technique is what separates amateur cakes from professional-looking masterpieces. That initial thin layer of frosting acts as a foundation, trapping crumbs so your final coat is perfectly smooth and pristine. The 30-minute chill time allows the frosting to firm up just enough to prevent mixing with your final layer.
Choosing the Right White Chocolate: This cannot be overstated—real white chocolate (which contains cocoa butter, sugar, and milk solids) melts smoothly and creates a luxurious, creamy frosting. Candy melts or white chips contain stabilizers and different fats that resist melting properly, resulting in a grainy, waxy frosting that never achieves that silky texture we’re after.
Room Temperature is Everything: When butter, eggs, and buttermilk are all at room temperature (68-70°F), they emulsify beautifully, creating a smooth, uniform batter with tiny, evenly distributed air bubbles. This is what gives you that tender, fine crumb. Cold ingredients simply can’t emulsify properly and will result in a denser, less refined texture.
The Buttermilk Secret: Buttermilk isn’t just for moisture—its acidity reacts with the baking powder to create additional lift and also tenderizes the gluten structure in the flour, resulting in an incredibly soft cake. Don’t substitute regular milk; the results won’t be the same.
Decorating Your White Chocolate Macadamia Nut Cake
This is where your elegant layer cake transforms into a true work of art. Here are my favorite finishing touches:
The Classic Approach: Gently press chopped, toasted macadamia nuts around the bottom third of the cake, creating a beautiful textured border. Create a generous pile of white chocolate curls or shavings in the center of the cake top, and arrange several whole toasted macadamia nuts artfully around them.
For Extra Decadence: Before placing your final garnishes, use a spoon to drizzle thin ribbons of salted caramel sauce over the top of the cake, letting it drip naturally down the sides. The contrast of the golden caramel against the white frosting is absolutely stunning.
Modern Elegance: Keep the frosting smooth and minimal, then create a striking arrangement of white chocolate shards (make these by spreading melted white chocolate thin on parchment, letting it set, then breaking into artistic pieces) standing upright on top of the cake.
Rustic Chic: Use your offset spatula to create swoops and swirls in the frosting rather than smoothing it perfectly, giving the cake a more organic, artisanal appearance. Scatter toasted macadamia nut halves randomly across the top and around the base.
Storing Your White Chocolate Macadamia Nut Cake
Serving: This cake truly shines when served at room temperature. The cake layers are at their most tender, and the buttercream becomes impossibly silky and smooth. Remove your cake from the refrigerator 45-60 minutes before serving to allow it to come to room temperature naturally.
Slicing Pro Tip: For those Instagram-worthy, bakery-perfect slices, use a long, sharp knife dipped in very hot water. Wipe the blade completely clean and dry it between each cut. The hot knife glides through the frosting without dragging or tearing, creating clean, professional edges.
Storage: Because this cake features buttercream frosting (which contains butter and cream), it must be stored properly. Place the cake in an airtight container or cover it loosely with plastic wrap (tent it so the wrap doesn’t touch the frosting) and refrigerate for up to 4-5 days. The cake actually becomes even more moist and flavorful on day two as the flavors meld together.
Freezing: You can freeze unfrosted cake layers for up to 3 months. Wrap each cooled layer tightly in plastic wrap, then in aluminum foil. Thaw overnight in the refrigerator before frosting. The frosted cake can also be frozen—freeze it uncovered until firm, then wrap well. Thaw overnight in the refrigerator.
Grand Finale
This white chocolate macadamia nut cake isn’t just a recipe—it’s an experience. It’s the hushed moment when you slice through those perfect layers, revealing the studded nuts and chocolate against the tender golden crumb. It’s the look on someone’s face when they taste that first bite, the interplay of buttery richness and sweet sophistication dancing across their palate. It’s the centerpiece that makes birthdays feel more festive, anniversaries more romantic, and holidays more memorable.
You’ve mastered the techniques that professional bakers use. You’ve learned the secrets that transform good cakes into extraordinary ones. Now it’s time to create your masterpiece.
Whether you’re baking this stunning gourmet cake from scratch for a milestone celebration or simply because Tuesday deserves something special, I promise you this: the process is as rewarding as the result, and the result will exceed your highest expectations.
So preheat that oven, gather your ingredients, and prepare to create something truly spectacular. Your celebration deserves nothing less than this showstopping beauty.
FAQs About White Chocolate Macadamia Nut Cake
Can I make this in a 9×13 inch pan? Absolutely! Pour all the batter into a greased and floured 9×13 inch pan and bake at 350°F for 40-45 minutes, until a toothpick comes out with moist crumbs. Let it cool completely in the pan, then frost the top. You won’t have the dramatic layers, but the flavor will be just as incredible. This makes a perfect sheet cake for casual gatherings.
Can I make this cake ahead of time? Yes! This is actually an excellent make-ahead cake. Bake the layers up to 2 days in advance, let them cool completely, then wrap each layer tightly in plastic wrap and store at room temperature. For longer storage, freeze wrapped layers for up to 3 months. Thaw overnight in the refrigerator before assembling. The frosting can be made 1 day ahead and stored refrigerated in an airtight container—just let it come to room temperature and give it a quick re-whip before using.
My white chocolate seized when I melted it! What did I do wrong? White chocolate is notoriously temperamental. Seizing (when chocolate becomes thick, grainy, and clumpy) typically happens for two reasons: overheating or moisture exposure. White chocolate has a lower melting point than dark chocolate—heat it gently using short intervals in the microwave (20 seconds maximum) or a double boiler. Even a single drop of water can cause seizing, so make sure all your equipment is completely dry. If it does seize, you can sometimes save it by whisking in a teaspoon of vegetable oil or cocoa butter.
Can I use different nuts? While macadamia nuts provide that signature buttery richness, you can absolutely adapt this recipe. Pecans are my second choice—their sweet, buttery flavor complements white chocolate beautifully. Walnuts work well too, though they have a slightly more assertive flavor. Toasted almonds offer a wonderful crunch. Whatever you choose, always toast the nuts first for maximum flavor and texture.
How do I prevent the nuts and chocolate from sinking to the bottom? The key is to toss your chopped nuts and chocolate chips in a tablespoon of flour (taken from the measured amount in the recipe) before folding them into the batter. The light coating of flour helps suspend them throughout the batter. Also, don’t overmix after adding them—gentle folding is all you need.
Can I use white chocolate chips instead of baking bars for the frosting? I strongly recommend against this. White chocolate chips contain stabilizers that prevent them from melting smoothly, which can result in a grainy, separated frosting. Baking bars (or feves/discs) melt into a silky, smooth consistency that creates that luxurious frosting texture we’re after. It’s worth the extra investment for the superior result.