Lotus Biscoff Cheesecake Recipe
If you haven’t fallen head over heels for the caramelized spiced perfection that is Lotus Biscoff Cheesecakeyet, prepare for your life to change dramatically. This global sensation has taken the dessert world by storm, and for good reason! That unique cinnamon-y, caramel-like flavor with hints of warm spices is absolutely addictive—whether in cookie form or as that gloriously creamy spread.
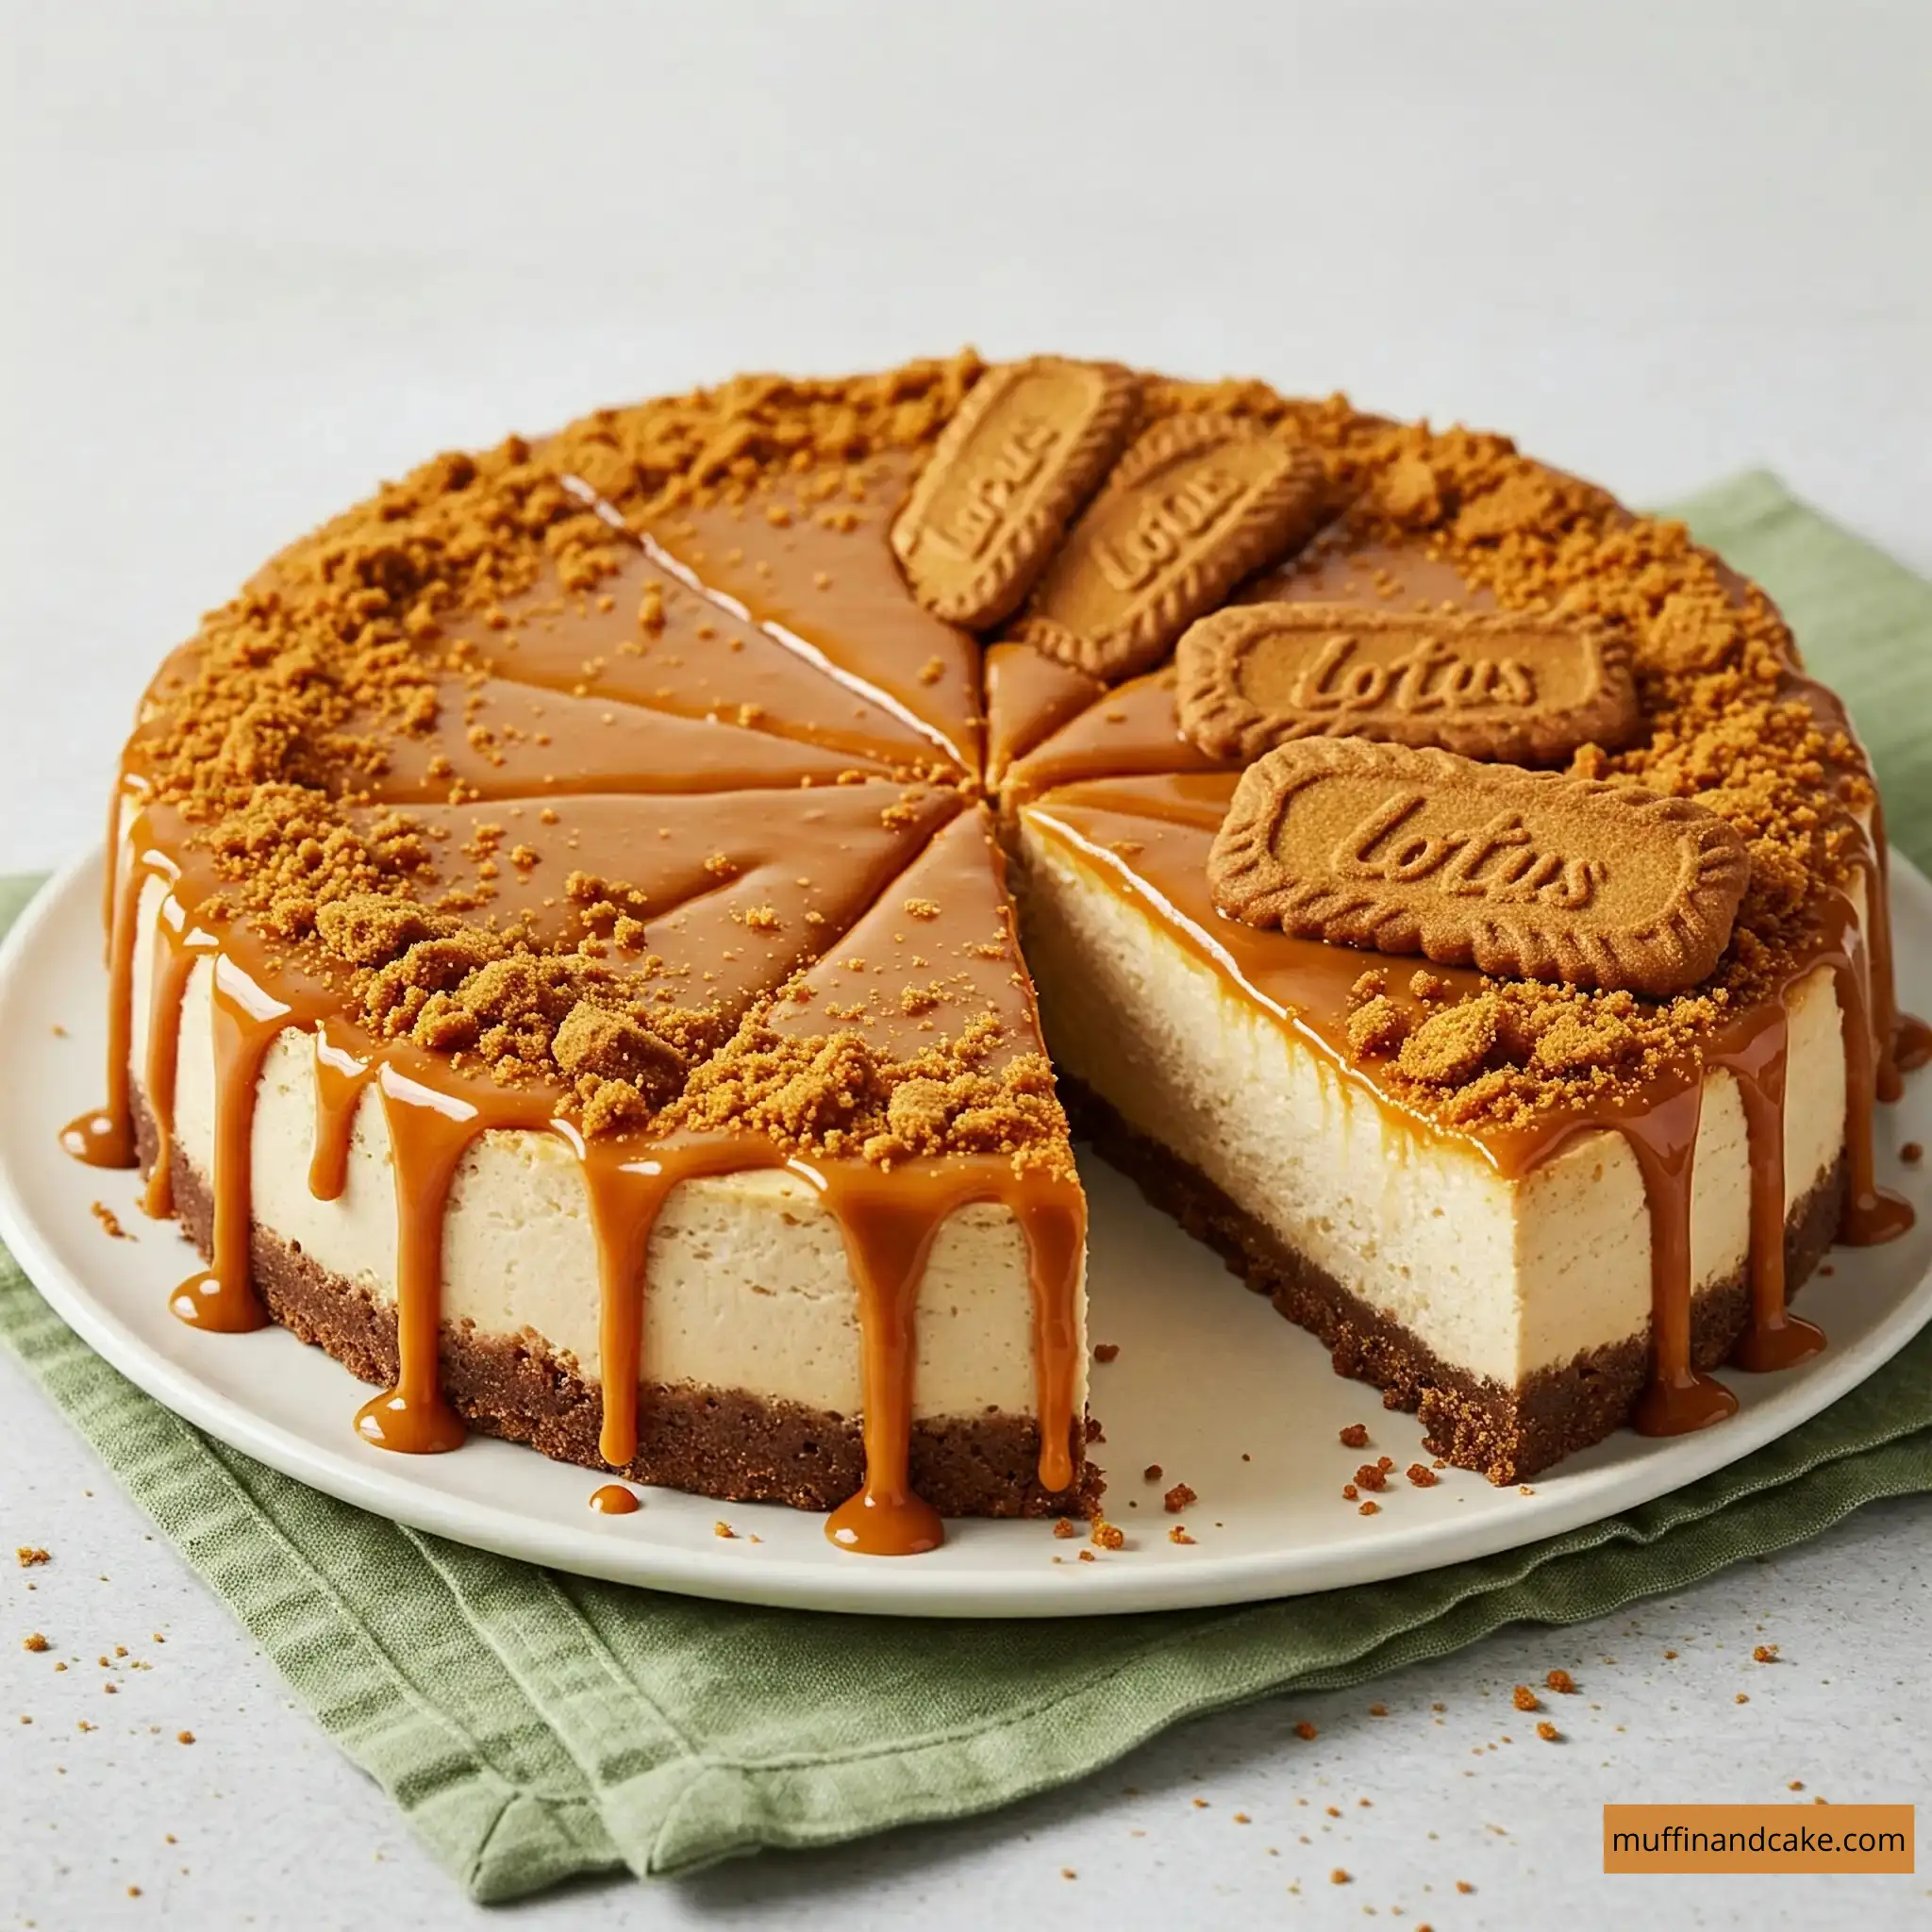
But today? We’re taking Biscoff to its ultimate destiny: THE Lotus Biscoff Cheesecake of your dreams. I’m talking about a buttery, crunchy Biscoff cookie crust, a silky-smooth cheesecake filling completely infused with that iconic cookie butter flavor, all topped with even MORE Biscoff goodness. This is the dessert that will have your friends begging for the recipe and frantically searching your kitchen for seconds (or thirds).
The best part? I’m giving you both the classic baked version AND the no-bake option, so you can choose your own cheesecake adventure depending on your time, equipment, and confidence level. Both are utterly divine and guaranteed to make you the star of any gathering!
Why This Lotus Biscoff Cheesecake a Dream
- Insane Biscoff Flavor Intensity: We’re not just dabbling with Biscoff here—this cheesecake delivers concentrated cookie butter bliss in EVERY. SINGLE. BITE. From the crust to the filling to the topping, it’s a Biscoff lover’s paradise.
- Creamy & Dreamy Texture: The silky-smooth cheesecake filling perfectly contrasts with the crunchy Biscoff elements, creating that magical texture combination that makes your taste buds do a happy dance.
- Showstopper Presentation: This isn’t just a delicious dessert—it’s a jaw-dropping centerpiece. Those gorgeous Biscoff drizzles, cookie crumbles, and strategic whole cookie placement make for an Instagram-worthy creation every time.
- Surprisingly Simple Process: Whether you choose the traditional baked version or the quicker no-bake route, I’ve broken down every step to ensure even novice bakers can achieve cheesecake perfection.
- Foolproof Formula: My detailed instructions and pro tips (from years of baking obsession) ensure you’ll never face the dreaded crack-topped cheesecake or soggy-bottomed disaster.
- Crowd-Pleasing Guarantee: I’ve yet to meet ANYONE who doesn’t swoon over this recipe. Seriously—this dessert converts even the “I don’t have a sweet tooth” people.
Lotus Biscoff Cheesecake Recipe Overview
Baking Time and Nutrition Facts
12 Slices
30 Minutes
70 Minutes
650 Kcal
10 Hours
45g
7g
42g
8 Hours
Moderate
Essential Equipment:
- 9-inch springform pan
- Electric mixer (stand or hand)
- Rolling pin (for crushing cookies)
- Large mixing bowl
- Measuring cups and spoons
- Silicone spatula
Lotus Biscoff Cheesecake Ingredients
Key Ingredients
- For the Biscoff Cookie Crust:
2 packages (8.8 oz/250g each) Lotus Biscoff cookies (about 32-34 cookies)
Pinch of salt (optional, enhances flavor)
½ cup (113g) unsalted butter, melted
- For the Baked Cheesecake Filling:
3 packages (24 oz/680g) full-fat cream cheese, softened to room temperature (CRITICAL!)
1 cup (250g) Lotus Biscoff spread (smooth)
1 cup (200g) granulated sugar
3 large eggs, at room temperature
¼ cup (60g) sour cream, at room temperature
1 tablespoon vanilla extract
2 tablespoons all-purpose flour
- For the No-Bake Cheesecake Filling:
2 packages (16 oz/450g) full-fat cream cheese, softened to room temperature
1 cup (250g) Lotus Biscoff spread (smooth)
¾ cup (90g) powdered sugar, sifted
1 teaspoon vanilla extract
2 cups (480ml) heavy whipping cream, cold
2 tablespoons powdered sugar (for whipping cream)
- For the Topping (For Both Versions):
½ cup (125g) Lotus Biscoff spread, melted for drizzling
8-10 Lotus Biscoff cookies (some crushed, some whole for decoration)
Optional: ½ cup whipped cream for serving
How To Make Lotus Biscoff Cheesecake
Baked Biscoff Cheesecake Instructions:
Step 1: Prepare the Biscoff Crust
Instructions
- Preheat your oven to 325°F (165°C).
- In a food processor, pulse the Biscoff cookies until they become fine crumbs. (No food processor? Place cookies in a ziplock bag and crush with a rolling pin!)
- Transfer the crumbs to a bowl and mix in the melted butter until the mixture resembles wet sand.
- Press the mixture firmly into the bottom and slightly up the sides of your springform pan. Use the bottom of a measuring cup for a perfectly even crust.
- Bake the crust for 10 minutes, then remove and let cool while you prepare the filling.
- Once cool, wrap the outside of the springform pan with 2-3 layers of heavy-duty aluminum foil, ensuring it comes up the sides. This prevents water from seeping in during the water bath baking.
Step 2: Create the Biscoff Cheesecake Filling
Instructions
- In a large bowl using your electric mixer, beat the softened cream cheese on medium-low speed until completely smooth and free of lumps, about 2 minutes. Scrape down the bowl frequently during mixing!
- Add the Biscoff spread and mix until fully incorporated.
- Add the sugar and mix until smooth.
- Add eggs ONE AT A TIME on low speed, mixing just until each is incorporated before adding the next. Do not overmix once the eggs are added!
- Mix in the sour cream and vanilla extract.
- Finally, add the flour and mix on low just until combined.
- Optional but recommended: To ensure a silky-smooth filling, pass the mixture through a fine-mesh sieve.
Step 3: Assemble and Bake
Instructions
- Pour the filling over the cooled crust and smooth the top with an offset spatula.
- Optional: Drop small teaspoons of additional melted Biscoff spread on top and use a knife to create beautiful swirls.
- Place your foil-wrapped springform pan into a larger roasting pan.
- Pour hot water into the roasting pan until it reaches about halfway up the sides of the springform pan.
- Carefully transfer to the oven and bake for 60-70 minutes. The cheesecake is done when the edges are set but the center still has a slight jiggle (about a 3-inch circle in the middle).
- Turn off the oven, crack the door open slightly, and let the cheesecake cool in the oven for 1 hour.
- Remove from the oven and cooling rack and let cool completely at room temperature.
- Cover and refrigerate for at least 6 hours, preferably overnight.
No-Bake Biscoff Cheesecake Instructions:
Step 1: Prepare the Biscoff Crust
Instructions
- Follow steps 2-4 as above for the baked version.
- Instead of baking, refrigerate the crust for at least 30 minutes to set firmly.
Step 2: Create the No-Bake Filling
Instructions
- In a large bowl, beat the softened cream cheese until completely smooth.
- Add the Biscoff spread and mix until fully incorporated and smooth.
- Add the sifted powdered sugar and vanilla extract, mixing until well combined.
- In a separate bowl, whip the cold heavy cream with 2 tablespoons powdered sugar until stiff peaks form.
- GENTLY fold the whipped cream into the Biscoff-cream cheese mixture using a rubber spatula. Start with ⅓ of the whipped cream to lighten the mixture, then fold in the remainder. Maintain as much air as possible for that perfect light texture!
Step 3: Assemble and Set
Instructions
- Spoon the filling over the chilled crust and smooth the top with an offset spatula.
- Cover with plastic wrap and refrigerate for AT LEAST 6 hours, though overnight is better for the perfect set.
The Grand Finale: Decorating Your Biscoff Cheesecake
Whether you chose baked or no-bake, the decoration process is the same and truly transforms this dessert into a showstopper:
Instructions
- Warm the ½ cup Biscoff spread in the microwave for 20-30 seconds until it reaches a pourable consistency.
- Carefully remove the sides of the springform pan.
- Pour or drizzle the melted Biscoff spread over the top of the cheesecake, letting it naturally cascade down the sides.
- Arrange whole Biscoff cookies around the perimeter, pressing gently into the sides.
- Crush a few Biscoff cookies and sprinkle the crumbs over the top for texture and visual appeal.
- If using, pipe whipped cream decoratively around the edges.
- For the ultimate presentation, place one perfect whole Biscoff cookie right in the center.
- Refrigerate for 15-20 minutes to set the decoration before serving.
Tips for Lotus Biscoff Cheesecake Bliss
- Room Temperature Isn’t Optional: For the creamiest, lump-free filling, make sure your cream cheese (and eggs/sour cream for baked version) sit out for AT LEAST 1-2 hours before mixing. Cold ingredients = lumpy cheesecake.
- The Secret to Perfect Biscoff Drizzles: Warm the spread just enough to be pourable but not hot. If it’s too runny, let it cool slightly before drizzling for those picture-perfect cascades.
- Preventing The Dreaded Crack (for baked version): The water bath isn’t negotiable! It provides gentle, even heat. Also, never open the oven door during baking, and don’t skip the gradual cooling process.
- For No-Bake Success: Make absolutely sure your cream is whipped to stiff peaks before folding. If it’s under-whipped, your cheesecake won’t set properly.
- Clean-Cut Slices: Dip your knife in hot water and wipe clean between each cut for picture-perfect slices that would make a pastry chef proud.
- Cookie Crumb Consistency: For the crust, aim for fine crumbs, but when adding crumbles as decoration, leave some slightly larger pieces for visual interest and texture contrast.
Delicious Variations to Feed Your Biscoff Addiction
- Chocolate Biscoff Cheesecake: Add ¼ cup cocoa powder to the filling and/or top with a layer of chocolate ganache before the Biscoff drizzle. Cookie butter + chocolate = heaven!
- Biscoff Cheesecake Bars: Make in a 9×13-inch pan for easier serving at larger gatherings. Reduce the baking time for the baked version by about 10-15 minutes.
- Mini Biscoff Cheesecakes: Use a muffin tin lined with paper liners. Perfect for portion control (if you have any self-control around Biscoff, which I certainly don’t).
- White Chocolate Biscoff: Add 4 oz melted and cooled white chocolate to the filling for an even richer experience.
- Extra Swirly: Reserve ¼ cup of the filling, mix it with 2 tablespoons additional Biscoff spread, then dollop it on top of the cheesecake and swirl with a knife before baking/chilling.
Storing your Lotus Biscoff Cheesecake
- Best Served: Chilled but not ice-cold—remove from refrigerator about 20 minutes before serving to allow the flavors to fully bloom.
- Storage: Keep covered in the refrigerator for up to 5 days (though it’s unlikely to last that long before being devoured).
- Freezing: This cheesecake freezes beautifully! Wrap individual slices or the whole cheesecake (without decoration) tightly in plastic wrap, then foil. Freeze for up to 3 months. Thaw overnight in the refrigerator, then decorate before serving.
You Need This Lotus Biscoff Cheesecake!
There you have it—the ultimate Lotus Biscoff Cheesecake that perfectly captures the essence of that iconic spiced cookie butter flavor we all crave. Whether you chose the classic baked version or the quick-and-easy no-bake option, you’ve just created a dessert that will have everyone thinking you’re a professional pastry chef.
The combination of that crunchy Biscoff base, the silky-smooth cookie butter-infused filling, and the indulgent toppings creates pure dessert magic that’s simultaneously familiar and extraordinary. Just try to share it (if you can)!
Have you made this recipe? I’d LOVE to see your creations! Tag me on Instagram or drop a comment below with your experience. Got other Biscoff recipe ideas? I’m always looking for new ways to feed my cookie butter obsession!
FAQs About Lotus Biscoff Cheesecake
Q: Can I use crunchy Biscoff spread instead of smooth? A: Absolutely! The crunchy version will give you little bits of cookie texture throughout the filling. Just be aware it’s slightly harder to get a completely smooth filling, but many people prefer this added texture element!
Q: My no-bake cheesecake didn’t set properly. What went wrong? A: The most common issues are not whipping the cream to stiff enough peaks before folding, or not chilling for long enough. Make sure you’re using full-fat cream cheese, whip that cream until it can hold its shape firmly, and give it at least 6 hours (preferably overnight) to set.
Q: Can I reduce the sugar in this recipe? A: You can reduce the sugar by about ¼ cup without drastically affecting texture, but remember that sugar contributes to both structure and preservation. The Biscoff spread is already sweet, which is why we don’t go overboard with added sugar.
Q: Where can I find Lotus Biscoff products? A: Most major supermarkets now carry both the cookies and spread! Look in the cookie aisle for the biscuits and in the peanut butter/spread section for the Biscoff spread. If you can’t find them locally, they’re readily available online.
Q: Can I make this cheesecake without a springform pan? A: While a springform pan makes unmolding much easier, you can use a regular cake pan lined with parchment paper with extended “handles” to help lift the cheesecake out after it’s set. For the no-bake version, a pie dish works in a pinch, though you won’t get that classic tall cheesecake shape.
Q: How do I know when my baked cheesecake is done? A: The perfect cheesecake should still have a slight wobble in the center (about a 3-inch circle) when you gently shake the pan. The edges should be set and may have just started to pull away from the sides. It will continue to set as it cools.
Q: Can I make this cheesecake dairy-free? A: While I haven’t tested a dairy-free version, you could experiment with dairy-free cream cheese and coconut cream (for the heavy cream in the no-bake version). If you try it, please let me know how it works out!