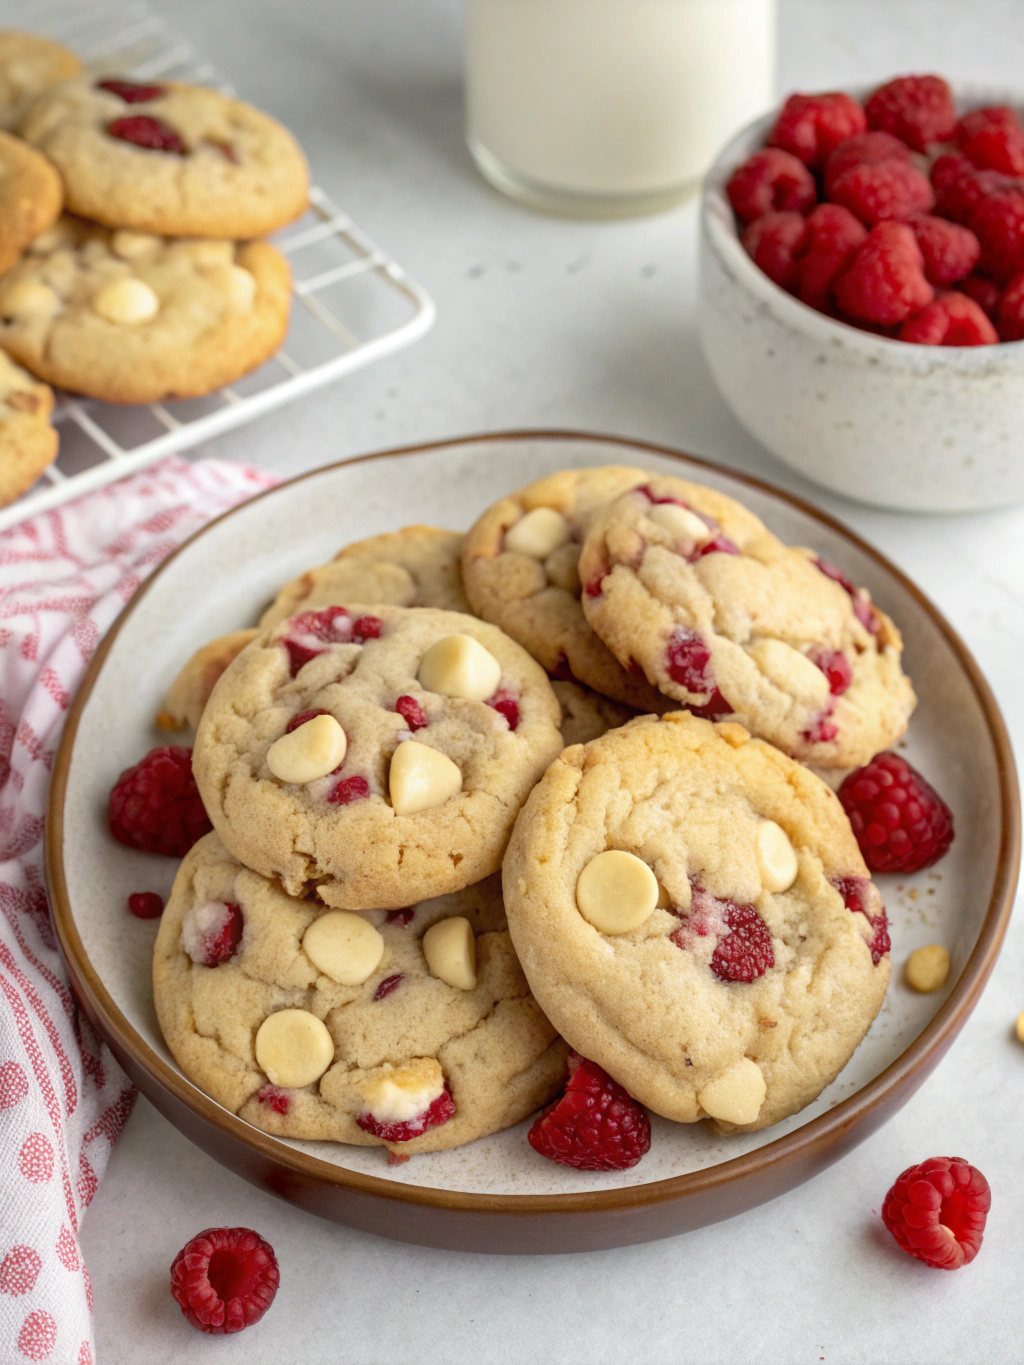
Chewy Raspberry Thumbprint Sugar Cookies
These raspberry thumbprint sugar cookies strike the ideal balance of sweet, tender cookie with bright, tangy raspberry filling that makes them irresistible for any occasion.
Whether you’re looking for a cheerful spring treat, a Valentine’s Day surprise, an elegant addition to a baby shower dessert table, or simply something to brighten an ordinary afternoon, these pretty pink cookies deliver both stunning looks and wonderful flavor. The best part? While they look impressive, they’re actually quite simple to make!
Why These Raspberry Thumbprint Sugar Cookies Shine
- Perfect sweet-tart balance: The buttery, vanilla-infused sugar cookie provides the perfect canvas for the bright, slightly tart raspberry filling
- Beautiful appearance: The vibrant pink centers make these cookies truly eye-catching and gift-worthy
- Soft, tender texture: These cookies have slightly crisp edges with perfectly soft centers
- Year-round possibility: Make them with fresh raspberries in summer or quality raspberry preserves anytime
- Versatile for occasions: Perfect for holidays, celebrations, or everyday treats
- Easier than they look!: Simple techniques yield professional-looking results
The magic of these raspberry thumbprint sugar cookies lies in how the tart raspberry filling cuts through the sweet, buttery cookie base. This creates a perfectly balanced bite that keeps you coming back for more. The slight tanginess of real raspberry prevents these cookies from being overly sweet, making them appealing to both children and adults alike.

Raspberry Thumbprint Sugar Cookies Recipe Overview
Baking Time and Nutrition Facts
24 Cookies
15 Minutes
14 Minutes
90 Minutes
60 Minutes
165 Kcal
8g
1.5g
9g
Raspberry Thumbprint Sugar Cookies Ingredients
Key Ingredients
- Cookie Dough Ingredients:
1 cup (226g) unsalted butter, softened at room temperature
2/3 cup (133g) granulated sugar
1 large egg, room temperature
1 teaspoon pure vanilla extract
1/4 teaspoon almond extract (optional, enhances the raspberry flavor)
2 1/4 cups (281g) all-purpose flour, spooned and leveled
1/2 teaspoon baking powder
1/4 teaspoon salt
- Raspberry Filling Ingredients:
1/2 cup (160g) high-quality seedless raspberry preserves OR
1 cup fresh raspberries + 2 tablespoons granulated sugar + 1 tablespoon cornstarch OR
3 tablespoons freeze-dried raspberry powder mixed with 1/3 cup raspberry preserves for extra intense flavor
Important Notes on Ingredients:
Butter Quality and Temperature: Use good quality unsalted butter for the cleanest flavor. The butter should be softened but still cool to the touch – you should be able to make a slight indentation with your finger, but the butter shouldn’t be melting or shiny.
Flour Measurement: Always spoon flour into your measuring cup and level off with a knife rather than scooping directly with the measuring cup. This prevents using too much flour, which would result in dry, crumbly cookies.
Raspberry Options:
- Preserves/Jam: Look for a high-quality, seedless raspberry preserve for the smoothest filling and most vibrant color. Brands that use real fruit rather than artificial flavors will give you the best taste.
- Fresh Raspberries: If using fresh, you’ll need to cook them down slightly with sugar and cornstarch to create a thickened filling that won’t make your cookies soggy.
- Freeze-Dried Raspberry Powder: This secret ingredient delivers intense raspberry flavor and vibrant color without adding moisture. It’s perfect for enhancing store-bought preserves or creating raspberry-infused frosting.
Tools You Will Need
- Large mixing bowl
- Measuring cups and spoons
- Whisk
- Silicone spatula
- Baking sheets
- Parchment paper or silicone baking mats
- Cookie scoop
- Wire cooling rack
How To Make Raspberry Thumbprint Sugar Cookies
Instructions
- Prepare: Preheat your oven to 350°F (175°C). Line two baking sheets with parchment paper.
- Cream the butter and sugar: In a large bowl using a hand mixer or stand mixer with paddle attachment, beat the softened butter and granulated sugar together on medium-high speed until light and fluffy, about 2-3 minutes. Don’t rush this step – proper creaming incorporates air for tender cookies.
- Add wet ingredients: Beat in the egg, vanilla extract, and almond extract (if using) until fully combined, scraping down the sides of the bowl as needed.
- Mix dry ingredients: In a separate bowl, whisk together the flour, baking powder, and salt.
- Combine: With the mixer on low speed, gradually add the dry ingredients to the wet ingredients, mixing just until incorporated. Be careful not to overmix once the flour is added, as this can develop gluten and make your cookies tough.
- Chill the dough: Cover the dough and refrigerate for at least 1 hour (or up to 3 days). This step is crucial for preventing spreading and making the dough easier to handle.
- Shape the cookies: Roll the chilled dough into 1-inch balls (about 1 tablespoon of dough each). Place them 2 inches apart on the prepared baking sheets.
- Create indentations: Using your thumb or the back of a rounded 1/2 teaspoon measuring spoon, make an indentation in the center of each cookie ball, being careful not to press all the way through to the baking sheet.
Step-by-Step: Adding the Raspberry Magic
If Using Raspberry Preserves:
Instructions
- Fill each indentation with about 1/2 teaspoon of raspberry preserves. Don’t overfill, as the preserves may bubble and spill over during baking.
- Bake the cookies for 12-14 minutes, until the edges are just set and barely beginning to turn golden. The centers will still be soft, and that’s perfect!
- Allow the cookies to cool on the baking sheet for 5 minutes before transferring to a wire rack to cool completely.
If Using Fresh Raspberries:
Instructions
- In a small saucepan, combine 1 cup of fresh raspberries with 2 tablespoons of sugar. Mash lightly and cook over medium heat until the berries begin to break down and release their juices, about 3-4 minutes.
- Whisk 1 tablespoon of cornstarch with 1 tablespoon of water in a small bowl, then stir this mixture into the simmering raspberries.
- Cook for another 1-2 minutes until thickened. Remove from heat and allow to cool completely before filling cookies.
- Follow the baking instructions as noted above.
Patissier’s Secrets for Pretty & Perfect Cookies
- Prevent spreading: Always chill your dough thoroughly. If your kitchen is warm, you can roll the dough balls and then chill them again for 15 minutes before making indentations and baking.
- Perfect indentations: If your indentations puff up slightly during baking (very common!), gently press them down again with the back of a spoon while the cookies are still warm from the oven.
- Avoid soggy bottoms: For thumbprint sugar cookies, you can partially bake the cookies for about 8 minutes, remove them from the oven, re-press the indentations if needed, add the filling, and then continue baking for the remaining time.
- Uniform cookies: Use a small cookie scoop for consistent sizing, which ensures even baking times.
- Enhanced raspberry flavor: For an even more intense raspberry flavor, mix a tablespoon of freeze-dried raspberry powder into your cookie dough. This creates a subtle pink color and delightful berry undertones in every bite.
- Prevent jam bleeding: Aim for clean edges when adding your raspberry filling. Using a small piping bag or zip-top bag with the corner snipped off can help with precise filling.
Fresh vs. Frozen vs. Jam vs. Powder: A Quick Guide
Fresh Raspberries
- Pros: Brightest, most authentic flavor
- Cons: Need to be cooked down and thickened; seasonal availability; can add excess moisture
- Best for: Summer baking when berries are at peak ripeness and affordability
Frozen Raspberries
- Pros: Available year-round; often picked at peak ripeness
- Cons: Must be thawed and cooked down to eliminate excess moisture
- Best for: Off-season baking when you want real raspberry flavor
Raspberry Preserves/Jam
- Pros: Convenient; consistent results; already properly thickened
- Cons: Can be overly sweet; quality varies greatly between brands
- Best for: Quick, reliable results and year-round baking
Freeze-Dried Raspberry Powder
- Pros: Intense flavor; vibrant natural color; no added moisture
- Cons: Can be expensive and harder to find
- Best for: Enhancing other forms of raspberry; creating natural pink color in dough or frosting
Flavor Variations & Creative Twists
- Add 1 teaspoon of lemon zest to the cookie dough for a refreshing lemon-raspberry combination
- Drizzle cooled cookies with white chocolate for elegant presentation and complementary flavor
- Swap the almond extract for 1/4 teaspoon of cardamom for a sophisticated flavor profile
- Roll the edges of the dough balls in granulated sugar before baking for a sparkling finish and slight crunch
- Shape the cookies into hearts for Valentine’s Day by making two thumbprints close together at an angle
How To Store Your Raspberry Thumbprint Sugar Cookies
- Room temperature: Store cooled cookies in an airtight container for up to 5 days. Place parchment paper between layers to prevent sticking.
- Refrigerator: If your kitchen is warm or humid, refrigeration will help preserve freshness for up to 1 week.
- Freezing baked cookies: Fully cooled cookies can be frozen in an airtight container with parchment between layers for up to 3 months. Allow to thaw at room temperature.
- Freezing dough: Shape the dough into balls, create indentations, and freeze on a baking sheet. Once solid, transfer to a freezer bag and store for up to 3 months. Thaw in the refrigerator overnight before filling and baking.
FAQs About Raspberry Thumbprint Sugar Cookies
Q: Why did my cookies spread too much during baking? A: The most common culprits are butter that’s too warm or insufficient chilling time. Make sure your dough is thoroughly chilled before baking, and your butter should be softened but still cool to the touch.
Q: Why did my raspberry jam bubble over and make a mess? A: Overfilling the indentations is usually the cause. Stick to about 1/2 teaspoon of filling per cookie, and make sure your indentations are deep enough without going through to the baking sheet.
Q: Can I use fresh raspberries instead of jam? A: Yes! But they need to be cooked down with sugar and cornstarch first to create a thickened filling, as outlined in the recipe instructions above.
Q: How do I get a vibrant pink color naturally? A: Freeze-dried raspberry powder is the secret weapon for intense natural color. You can add it to jam or mix it into your cookie dough for pink cookies without artificial coloring.
Q: Is chilling the dough really necessary? A: Absolutely! Chilling the dough prevents spreading, makes it easier to handle, and allows the flavors to develop more fully.
Q: Can I make these cookies ahead of time for an event? A: Yes! You can prepare the dough up to 3 days in advance and keep it refrigerated. Alternatively, baked cookies can be stored in an airtight container for up to 5 days or frozen for up to 3 months.
Sweet Baking !!
These raspberry thumbprint sugar cookies are truly the best of both worlds – a perfect harmony of tender, buttery cookie and bright, fruity raspberry. Their pretty pink centers make them as beautiful as they are delicious, perfect for gifts, special occasions, or simply brightening an ordinary day with something sweet.
The contrast of textures – the slightly crisp edges giving way to soft centers and that jewel-like raspberry filling – creates an irresistible treat that will have everyone reaching for seconds. Plus, with the option to use fresh berries in summer or quality preserves year-round, these cookies can become your signature sweet treat for any season.
What occasion would you bake these pretty pink cookies for? Or would you simply make them because it’s Tuesday and you deserve something delightful? Let me know in the comments below, and don’t forget to share your creations on Instagram with #BerrySweetTreats!