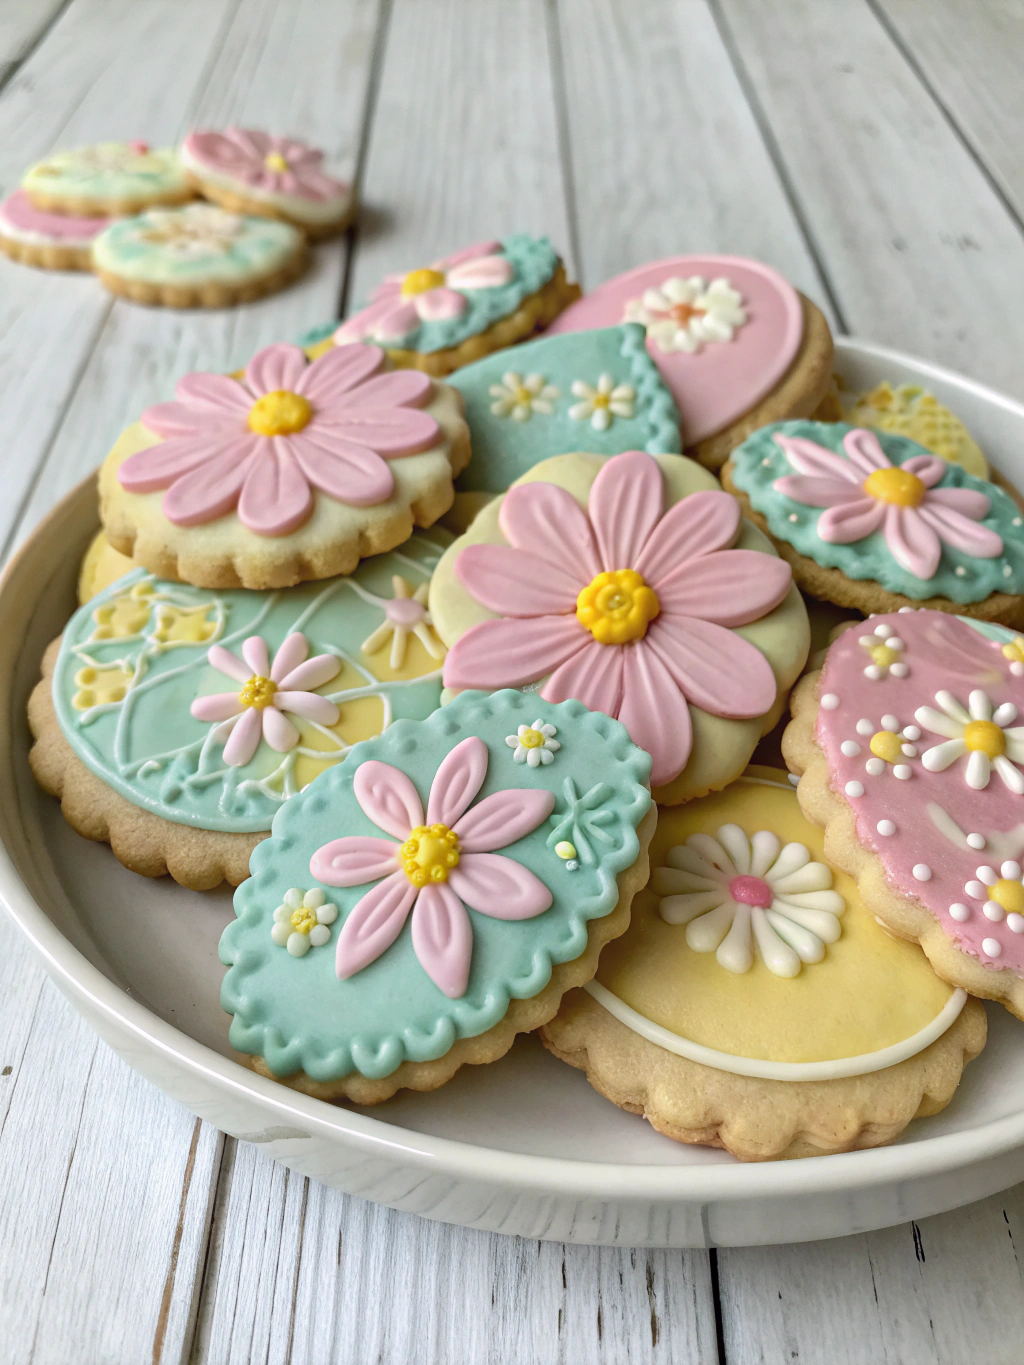
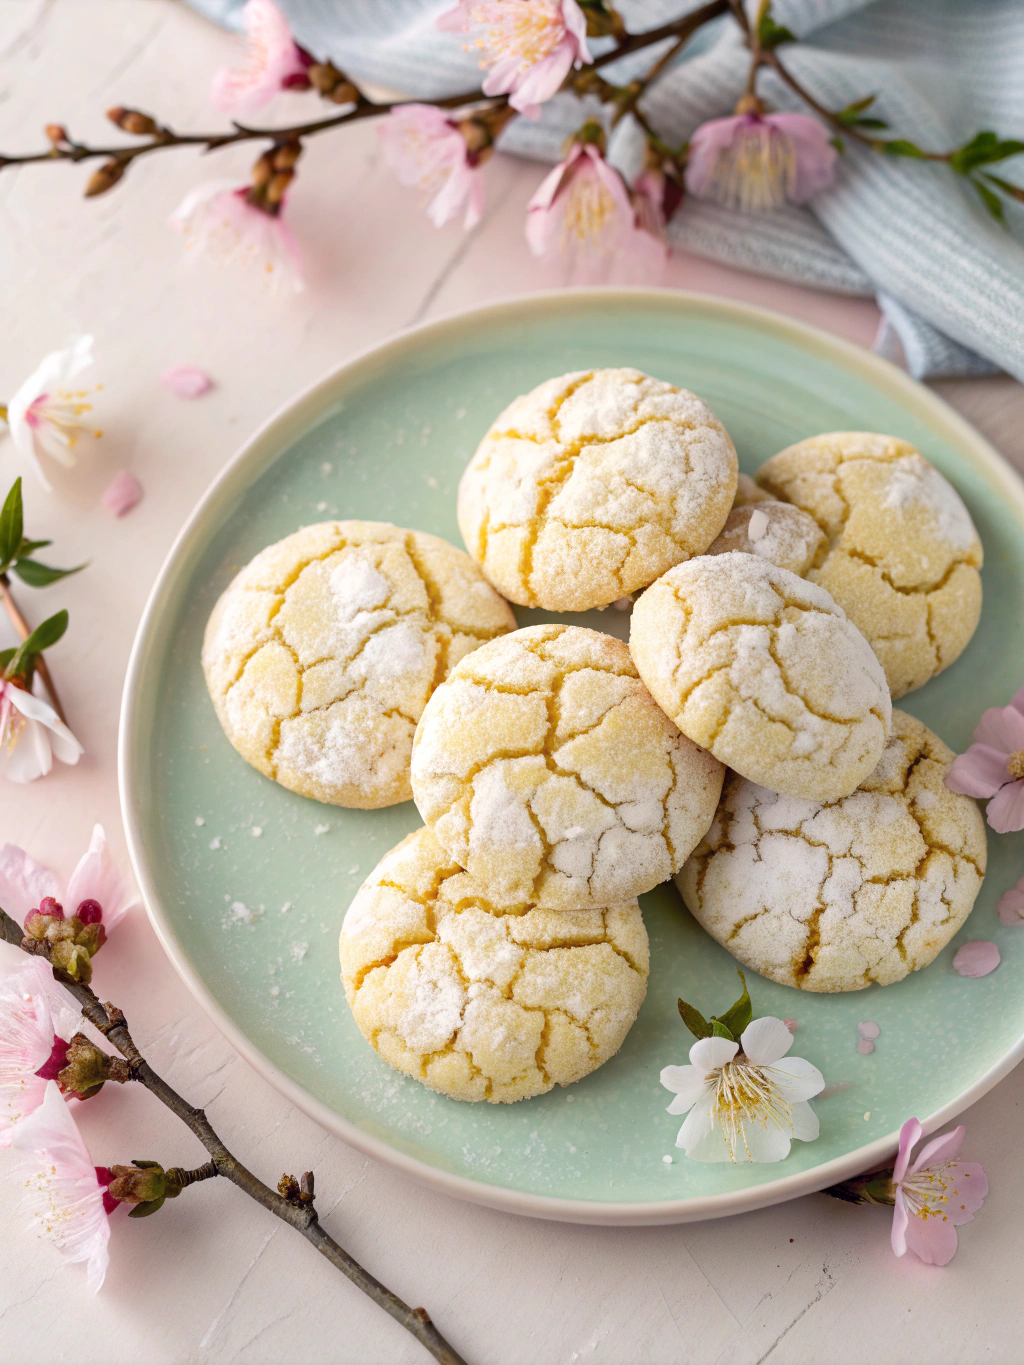
Perfect Spring Crinkle Cookies
Whether you’re planning for Easter celebrations, Mother’s Day brunches, spring bake sales, or simply want to brighten up an ordinary Tuesday, these easy crinkle cookies are your ticket to baking success. I’m going to share my foolproof, step-by-step guide that guarantees the most vibrant colors and the most dramatic crinkle effect every single time. No guesswork, no disappointments—just pure baking joy!
Spring Crinkle Cookies Recipe Overview
Baking Time and Nutrition Facts
30 cookies
12 minutes
10 minutes
4h20m
Spring Crinkle Cookies Ingredients
Key Ingredients
- For the Cookie Dough:
2 cups all-purpose flour (240g)
1 cup granulated sugar (200g)
½ cup vegetable oil (120ml) – Oil is the secret to that incredibly chewy texture!
2 teaspoons vanilla extract
2 large eggs, room temperature
2 teaspoons baking powder
½ teaspoon salt
- For Color & Spring Flavor:
High-quality gel food coloring in spring shades (pink, yellow, green, lavender)
Optional: 1 tablespoon fresh lemon zest or ½ teaspoon strawberry extract
- For the Signature Double Sugar Coating:
½ cup granulated sugar (for the first roll)
1 cup powdered sugar (for that dramatic crackle coating)
The Science Behind the Perfect Crinkle
Before we dive into the step-by-step crinkle cookie recipe, let’s talk about the magic happening in your oven! The secret to those gorgeous cracks lies in the dual sugar coating. When your chilled dough balls hit the hot oven, the outer layer of powdered sugar quickly forms a delicate crust. As the cookie expands and puffs up during baking, this crust can’t stretch with it—so it cracks in the most beautiful, random patterns. Meanwhile, that first layer of granulated sugar creates the perfect base for the powdered sugar to cling to and helps create even more dramatic contrast in the final crackle effect.
How To Make Spring Crinkle Cookies
Instructions
- Step 1: Create Your Perfect Base Dough
- In your stand mixer bowl, combine the vegetable oil and granulated sugar. Mix on medium speed for 2 minutes until well combined. Add the eggs one at a time, beating well after each addition, then mix in the vanilla extract.
- In a separate bowl, whisk together flour, baking powder, and salt. Gradually add these dry ingredients to your wet mixture, mixing on low speed just until a soft dough forms. Don’t worry—this dough will feel quite soft and slightly sticky. That’s exactly what we want for those perfectly chewy centers!
- Step 2: Chill the Dough (The Non-Negotiable Step!)
- Here’s where patience pays off beautifully. Cover your dough tightly with plastic wrap and refrigerate for at least 4 hours, preferably overnight. This chilling step is absolutely crucial for preventing your cookies from spreading into flat pancakes. Cold dough holds its shape, creating those gorgeous puffy cookies with perfect crinkle potential.
- Step 3: Create Your Spring Color Palette
- Once your dough is thoroughly chilled, divide it into 3-4 portions depending on how many colors you want to create. Working with one portion at a time, add a small amount of gel food coloring and knead it in with your hands until you achieve your desired spring shade.
Pro Tip: Start with just a tiny bit of gel coloring—you can always add more, but you can’t take it out! For perfect pastel cookies, aim for soft, dreamy colors rather than bold, intense shades. - Step 4: The Magical Double Sugar Roll
- Preheat your oven to 350°F (175°C) and line your baking sheets with parchment paper.
- Set up your sugar station with granulated sugar in one bowl and powdered sugar in another. Using your cookie scoop, portion the colored dough into balls. First, roll each ball in granulated sugar until lightly coated. Then—and this is crucial—roll it very generously in powdered sugar until it looks like a perfect little snowball. The dough should be completely hidden under a thick blanket of white sugar!
- Step 5: Bake to Perfection
- Place your sugar-coated dough balls on the prepared baking sheets, spacing them about 2 inches apart. Bake for 10-12 minutes, until the cookies are puffed and covered in those gorgeous cracks you’ve been dreaming of. The centers should still look slightly soft—don’t overbake, or you’ll lose that perfect chewy texture!
- Let them cool on the baking sheet for 5 minutes before transferring to a wire rack.
Secrets to the Perfect Crinkle
The Power of Chilling
I cannot stress this enough: cold dough is everything! When you skip the chilling step, your cookies will spread too quickly in the oven, resulting in thin, flat cookies instead of those beautiful puffy rounds we’re after. If your kitchen is particularly warm, you can even chill the shaped dough balls for 15 minutes before baking.
Why Gel Coloring is Best
Gel food coloring is concentrated magic! Unlike liquid food coloring, it won’t add excess moisture to your dough, which could affect the texture. Plus, you get incredibly vibrant colors with just a tiny amount. Your Easter cookies will have that perfect pastel perfection that looks absolutely stunning against the white crackled surface.
Don’t Skimp on the Powdered Sugar
When I say “generous,” I mean it! Your dough balls should look like they’ve been caught in a blizzard. That thick coating of powdered sugar is what creates those dramatic white cracks against your beautiful colored dough underneath.
Spring Flavor Variations & Creative Ideas
Lemon Sunshine Crinkles
Add 1 tablespoon of fresh lemon zest to your base dough and tint it sunny yellow. These taste like sunshine in cookie form!
Strawberry Patch Cookies
Replace the vanilla extract with ½ teaspoon of strawberry extract and create the prettiest pink cookies that taste as amazing as they look.
Funfetti Spring Celebration
After chilling your dough, gently fold in 2 tablespoons of pastel-colored sprinkles for an extra festive touch that kids absolutely adore.
Serving & Presentation Ideas
These stunning cookies are perfect for:
- Easter dessert tables
- Mother’s Day brunch spreads
- Spring picnic treats
- Beautiful gift boxes for teachers or neighbors
- Tea party accompaniments
Storing Your Spring Crinkle Cookies
Store your finished cookies in an airtight container at room temperature for up to one week. Place parchment paper between layers to prevent them from sticking together. The beauty of these cookies is that they actually get even more tender and delicious after a day or two of storage!
For longer storage, you can freeze the baked cookies for up to 3 months, or freeze the shaped (but unbaked) cookie balls and bake them directly from frozen, adding an extra minute or two to the baking time.
Troubleshooting: Why Didn’t My Cookies Crinkle?
If your cookies didn’t develop those gorgeous cracks, here are the most common culprits:
- Dough wasn’t cold enough: Always chill for the full time recommended
- Not enough powdered sugar: Really pile it on—don’t be shy!
- Oven temperature too low: Make sure your oven is properly preheated to 350°F
- Overbaking: Those cracks form in the first few minutes of baking
Your Spring Baking Success Story Starts Now!
Congratulations—you now have all the secrets to creating the most beautiful, delicious Spring Crinkle Cookies that will absolutely wow everyone who sees (and tastes!) them. This recipe is truly foolproof when you follow the steps, and the results are so rewarding that you’ll find yourself making batch after batch all season long.
The best part? These cookies bring pure joy to everyone involved in making them. From the satisfying process of rolling those dough balls in sugar to the magical moment when you pull perfectly crinkled cookies from the oven, this recipe celebrates everything wonderful about spring baking.
I can’t wait to see your colorful creations! Snap a photo of your gorgeous cookies and share them online—trust me, your friends will be begging for the recipe. Happy baking, and welcome to your new favorite spring tradition!