
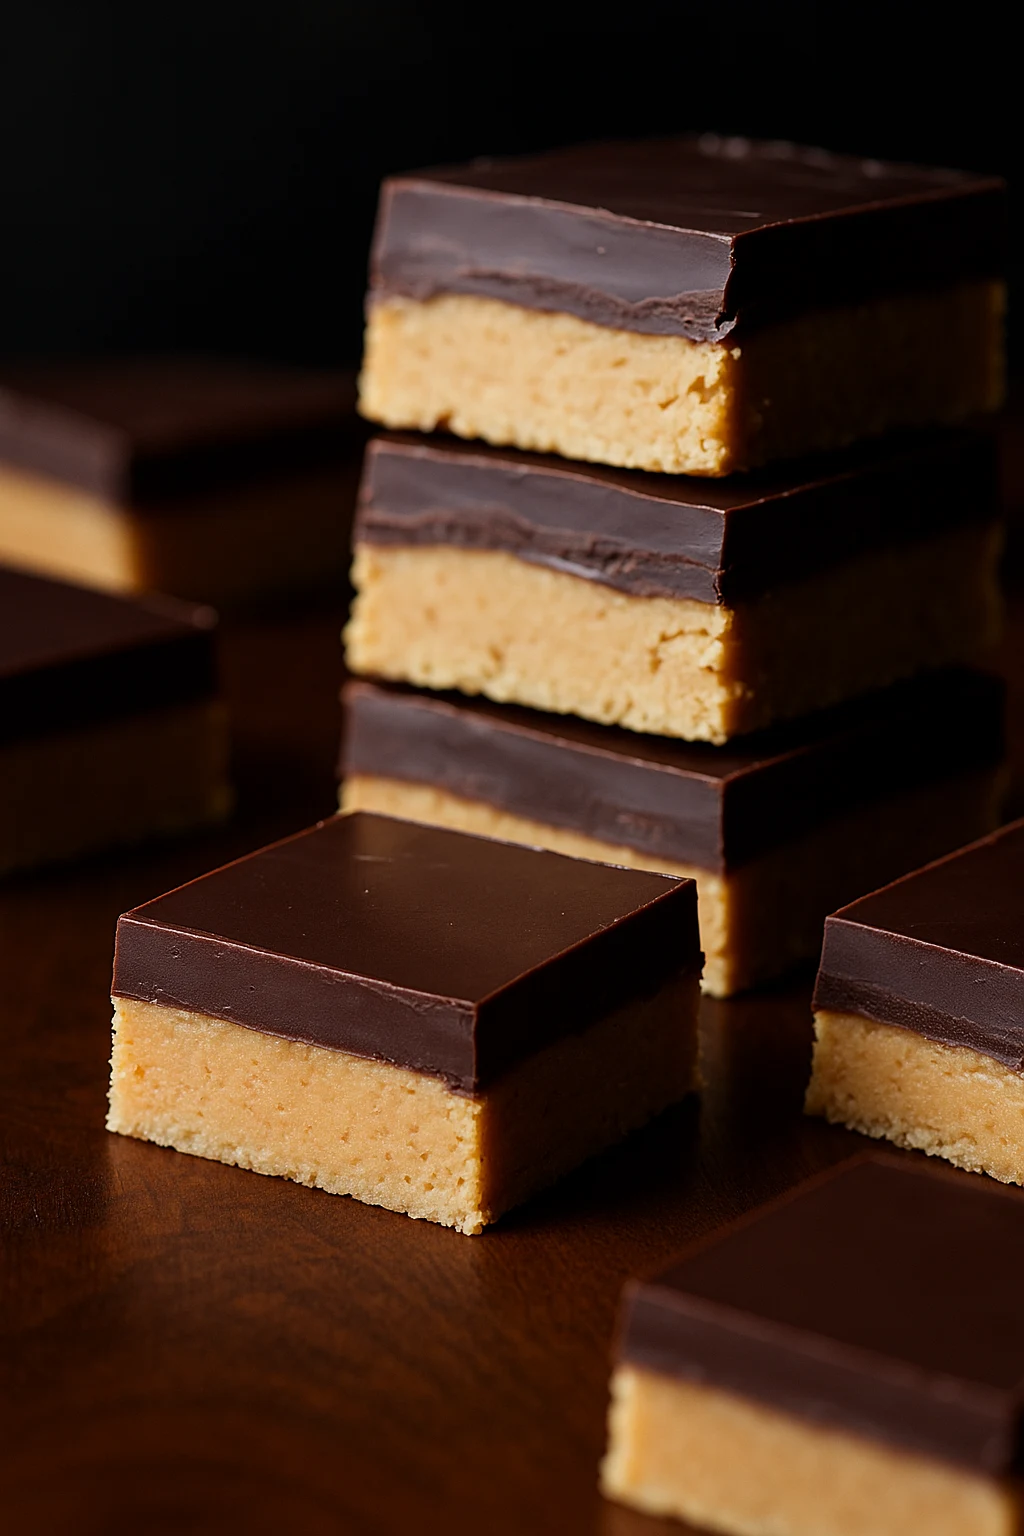
No-Bake Chocolate Honey Peanut Butter Bars
This is a ridiculously easy recipe that comes together in about 15 minutes of active time, requires zero baking, and uses simple ingredients you probably already have in your pantry. Whether you need a quick after-school snack, a lunchbox treat, or something to bring to a potluck, these Chocolate Honey Peanut Butter Bars are about to become your new go-to recipe.
Chocolate Honey Peanut Butter Bars Recipe
Baking Time and Nutrition Facts
16 bars
10 minutes
5 minutes
195 Kcal
Easy
2 hours
1 bar
2 hours 15 minutes
Chocolate Honey Peanut Butter Bars Ingredients
Key Ingredients
- For the Honey Peanut Butter Base:
1 cup creamy peanut butter (use conventional brands like Jif or Skippy for best results)
2 cups old-fashioned rolled oats
½ cup honey
1 teaspoon vanilla extract
¼ teaspoon salt
- For the Chocolate Topping:
1 cup semi-sweet chocolate chips
1 tablespoon peanut butter or coconut oil (for a smooth, glossy finish)
Baker’s Notes on Ingredients:
Peanut Butter: For the best, most consistent texture, use a conventional creamy peanut butter. Natural, oily peanut butters can separate and make the bars greasy. If you only have natural peanut butter, make sure to stir it very well and consider reducing the honey slightly.
Oats: Old-fashioned rolled oats provide the best chewy texture. I don’t recommend using quick-cooking oats (they can make the bars mushy) or steel-cut oats (they’ll be too crunchy and won’t bind properly).
Honey: Any type of honey works beautifully here. Local honey, clover honey, or wildflower honey all give wonderful results.
How To Make Chocolate Honey Peanut Butter Bars
Instructions
- Prep Your Pan
Line an 8×8 inch pan with parchment paper, leaving an overhang on two opposite sides to act as a sling for easy removal later. This simple step will save you so much hassle when it’s time to slice! - Make the Peanut Butter Base
In a medium saucepan over low heat, gently warm the peanut butter and honey together, stirring frequently until smooth and completely combined.
Baker’s Tip: You’re just warming it enough to mix easily—not boiling it! The mixture should be fluid and glossy, which usually takes about 2-3 minutes over low heat. - Combine with Oats
Remove the pan from the heat. Stir in the vanilla extract and salt first, then add the rolled oats. Mix thoroughly until every oat is coated with the honey-peanut butter mixture. It should look like a thick, sticky, cohesive mixture. - Press into Pan
Scrape the oat mixture into your prepared pan. Use the back of a spatula or your hands (lightly greased with cooking spray or a bit of oil) to press it into a firm, even layer. Press down firmly—this is important! A tightly packed base holds together better and gives the bars that satisfyingly dense, chewy texture. - Make the Chocolate Topping
In a microwave-safe bowl, combine the chocolate chips and 1 tablespoon of peanut butter (or coconut oil). Microwave in 30-second intervals, stirring between each, until the chocolate is completely melted and smooth. This usually takes 1-1.5 minutes total.
Alternative method: If you prefer, you can melt the chocolate using a double boiler on the stovetop. - Spread & Chill
Pour the melted chocolate over the peanut butter base and use a spatula to spread it into an even layer, covering the entire surface. Transfer the pan to the refrigerator and chill for at least 1-2 hours, or until the chocolate is completely firm and set. - Slice and Serve
Once chilled, lift the entire slab out of the pan using the parchment sling. Let it sit at room temperature for 5-10 minutes to make slicing easier. Use a large, sharp knife—dipping it in hot water and wiping it clean between cuts—to slice into 16 bars.
Pro-Tips for Bar Perfection
The Parchment Sling is Your Best Friend: This trick makes lifting the bars out of the pan effortless and gives you clean edges. Don’t skip this step!
Press Firmly: A firmly packed base holds together better when you slice the bars and gives them a satisfyingly dense chew. Use the bottom of a measuring cup if you need extra pressure.
The Secret to Clean Slices: Temperature matters! If the bars are too cold from the fridge, they can crack. Letting them sit at room temperature for a few minutes before slicing makes all the difference. And that hot knife trick? Game changer for professional-looking bars.
Don’t Overheat: Gently warming the peanut butter-honey mixture is all that’s needed. Overheating can cause the peanut butter to separate or become oily.
Make Ahead: These are actually better the next day after the flavors have had time to meld together in the fridge.
Chocolate Honey Peanut Butter Bars Variations
Salty & Sweet: Sprinkle a little flaky sea salt over the chocolate topping before it sets for that irresistible sweet-salty combination.
Extra Crunch: Use crunchy peanut butter for the base, or stir in ½ cup of Rice Krispies cereal or chopped roasted peanuts to the oat mixture.
Make it Vegan: Substitute maple syrup for the honey and ensure your chocolate chips are dairy-free. The texture will be slightly different but still delicious!
Gluten-Free: Simply use certified gluten-free rolled oats. That’s it—everything else is naturally gluten-free.
Dark Chocolate Lover: Swap the semi-sweet chocolate chips for dark chocolate chips (60-70% cacao) for a richer, less sweet topping.
Almond Butter Version: Substitute almond butter for peanut butter throughout the recipe for a different flavor profile.
Storing your Chocolate Honey Peanut Butter Bars
These chocolate honey peanut butter bars are best stored in an airtight container in the refrigerator to keep them firm and chewy. They will last for up to 2 weeks in the fridge (though they rarely last that long in my house!).
Freezer-Friendly: These bars freeze beautifully! Place them in a freezer-safe container with pieces of parchment paper between the layers to prevent sticking. They’ll keep for up to 3 months. Let them thaw in the refrigerator for a few hours before serving, or enjoy them straight from the freezer for a firmer, almost candy-bar-like treat.
Why You’ll Love These Peanut Butter Bars Without Powdered Sugar
Most no-bake peanut butter bars rely heavily on powdered sugar, which can make them overly sweet and give them a grainy texture. By using honey instead, these bars have a more sophisticated sweetness, a gorgeous golden color, and that irresistibly chewy texture that keeps you coming back for more. The oats add fiber and substance, making these feel just a little more wholesome than your average dessert bar—without sacrificing an ounce of deliciousness.
They’re the perfect solution for busy weekdays, last-minute bake sales, or when you just need something sweet without turning on the oven. Kids love them in lunchboxes, adults love them as an afternoon pick-me-up with coffee, and everyone loves them as a simple, crowd-pleasing dessert.


